Proxmox Part 1 - Encrypted Installation
Encrypted Proxmox installation on top of clean Debian 12
This post has been rewritten in Jun 2025
Motivation
If not already familiar with the goals, get familiar with the article Proxmox Part 0 - Project Specification
This article will mostly follow the official Proxmox tutorial on installing Proxmox on a fresh Debian 12.11 installation. Main difference being Debian configured with encryption.
Installing Debian
Prerequisites
- Download the Debian amd64 small installation image and flash it onto a USB thumb drive.
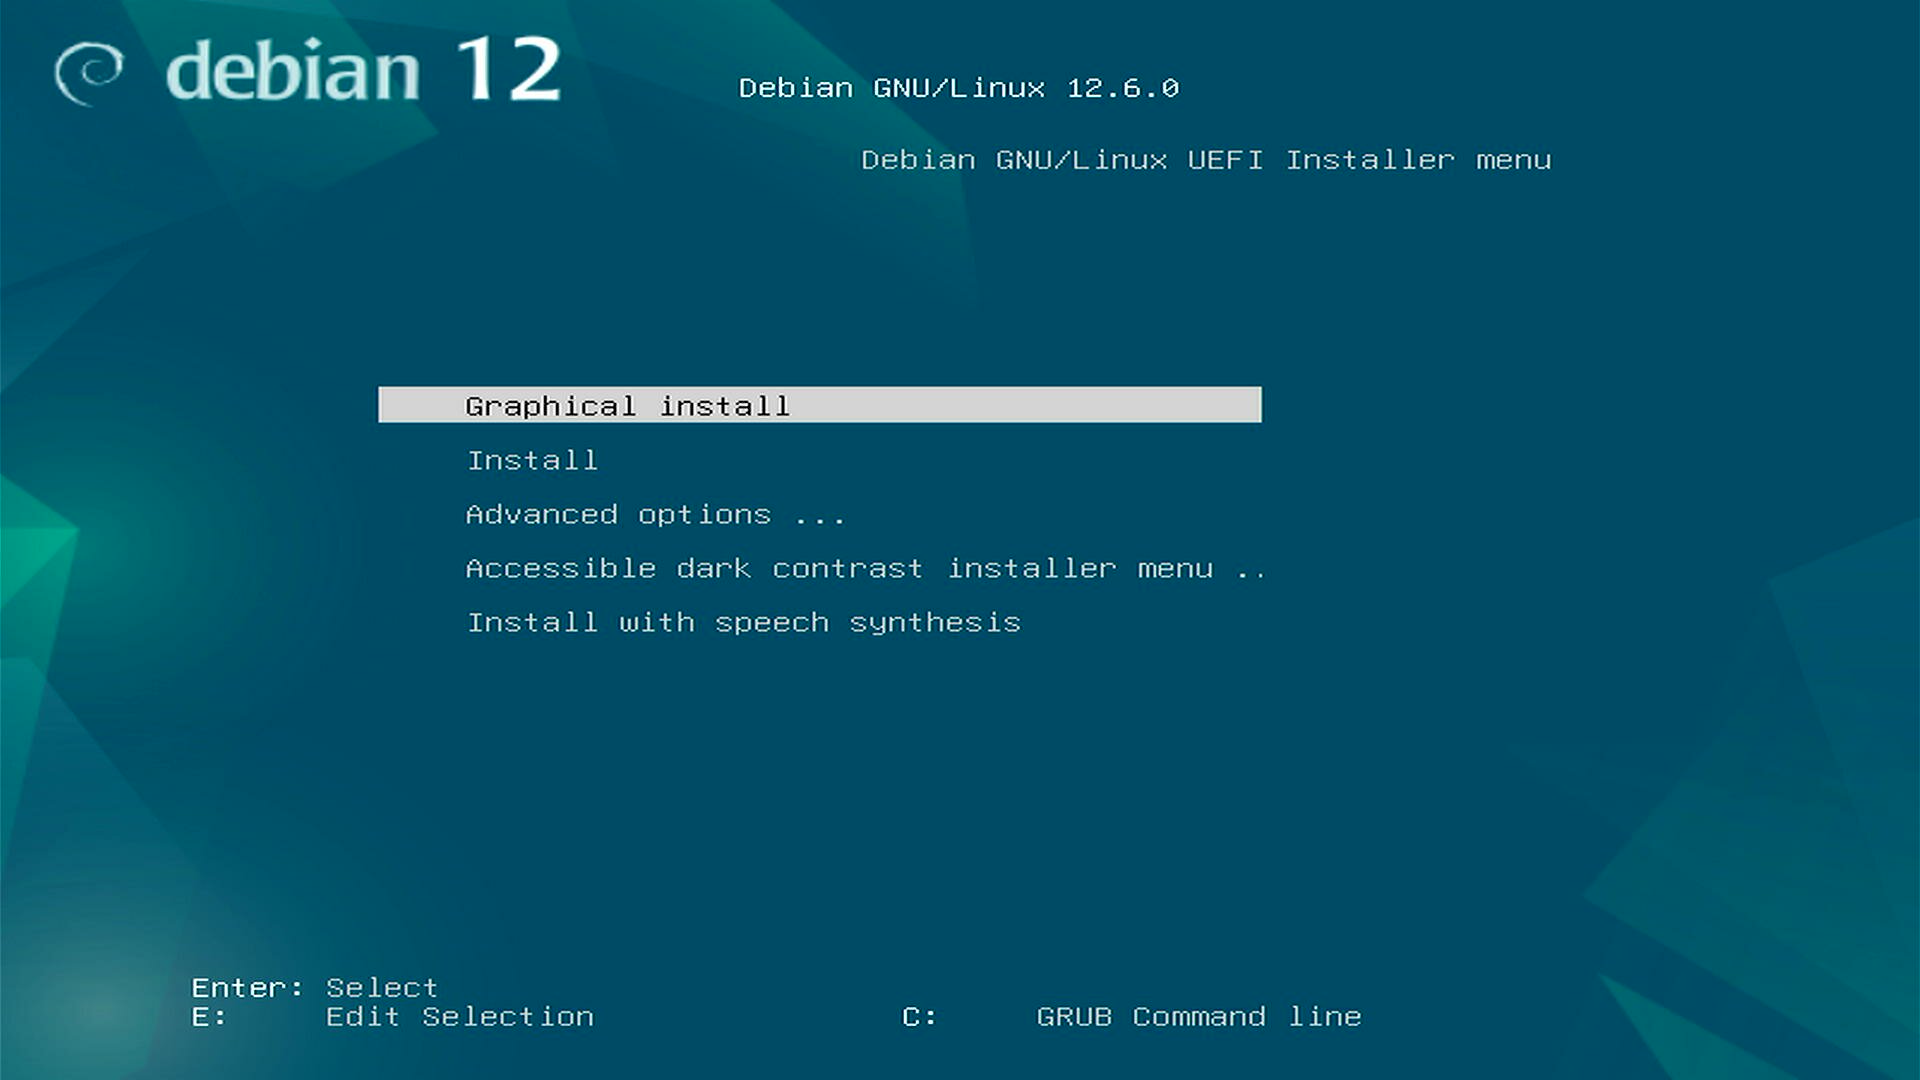
- Boot your system from the USB drive and begin the installation process.
- When the “Installation Menu” appears, interrupt the process!
Start Debian install with DHCP disabled
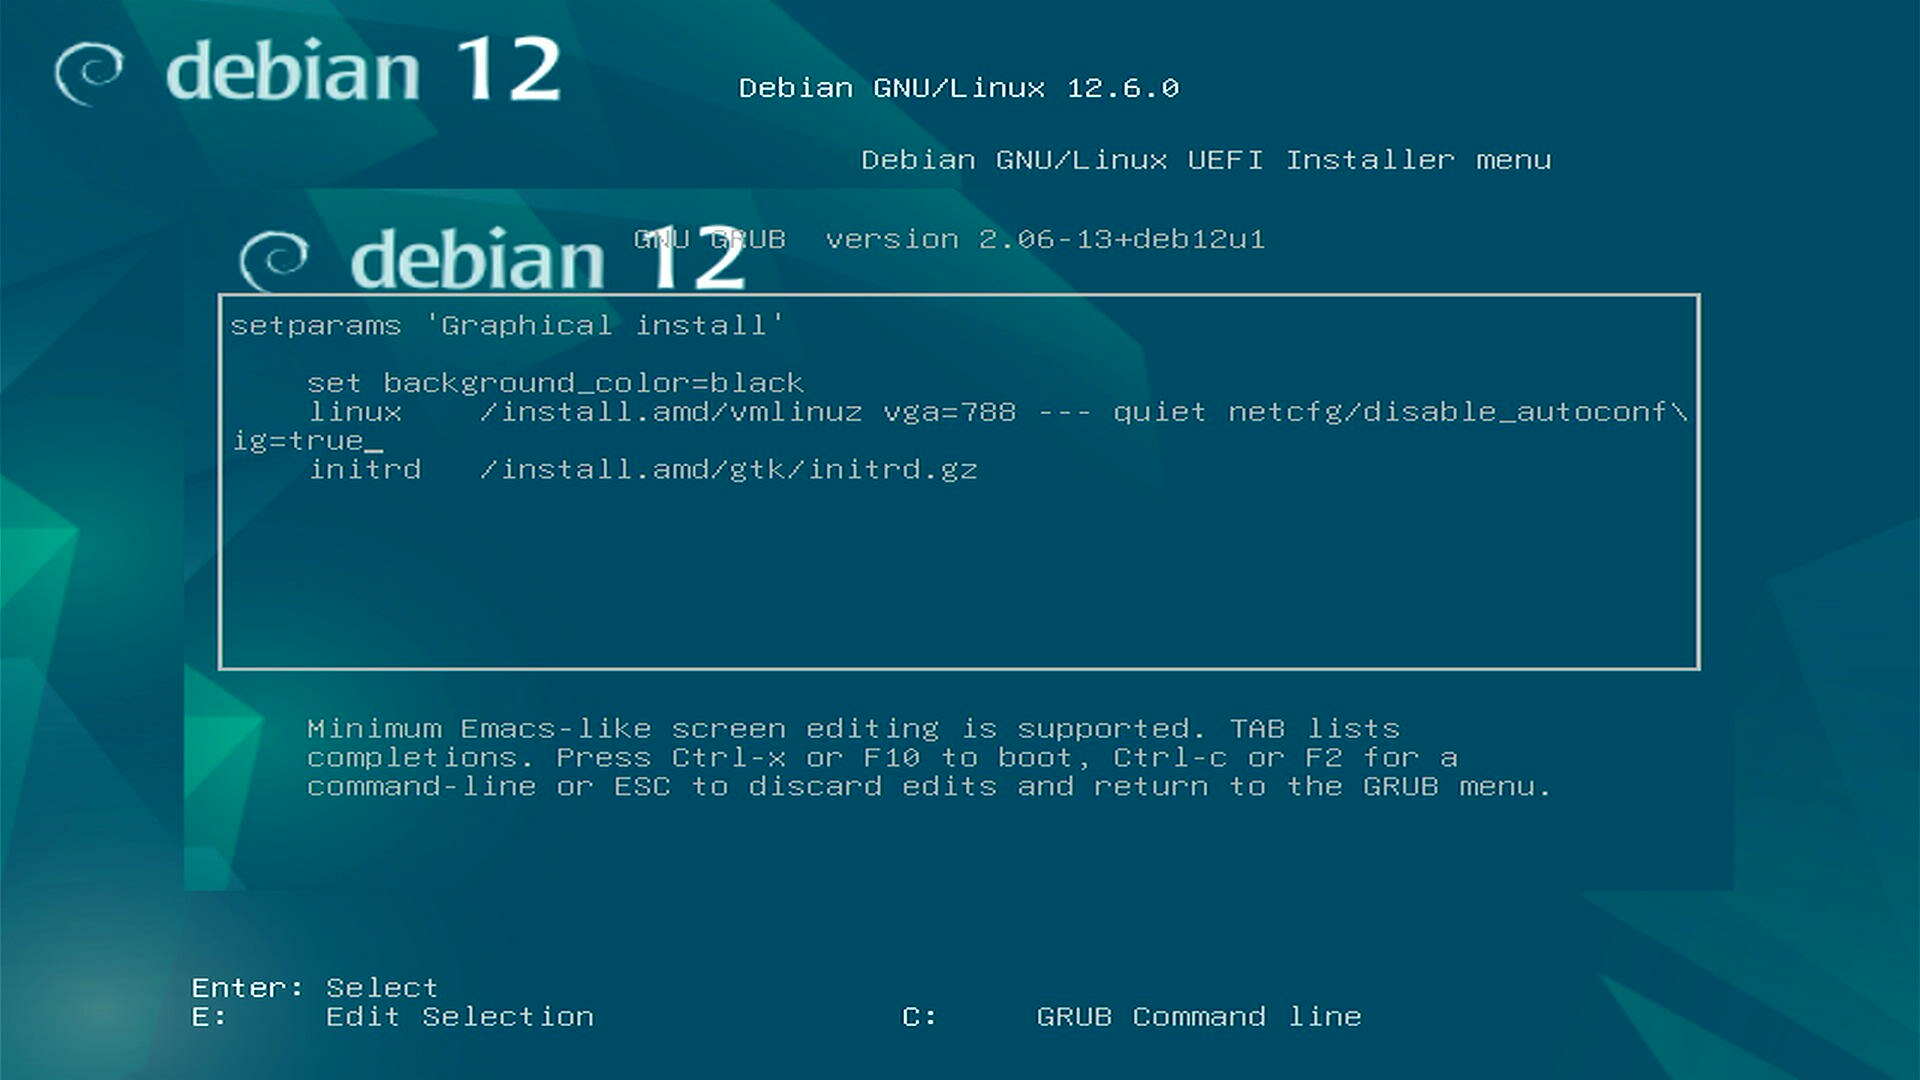
By default, the Debian installer attempts to use IP autoconfiguration and DHCP to obtain an IP address. We need to force it to use manual configuration instead.
- Press
eto enter edit mode. - Add
netcfg/disable_autoconfig=trueto the linux boot command line. - Press
F10to continue booting.
Network Configuration
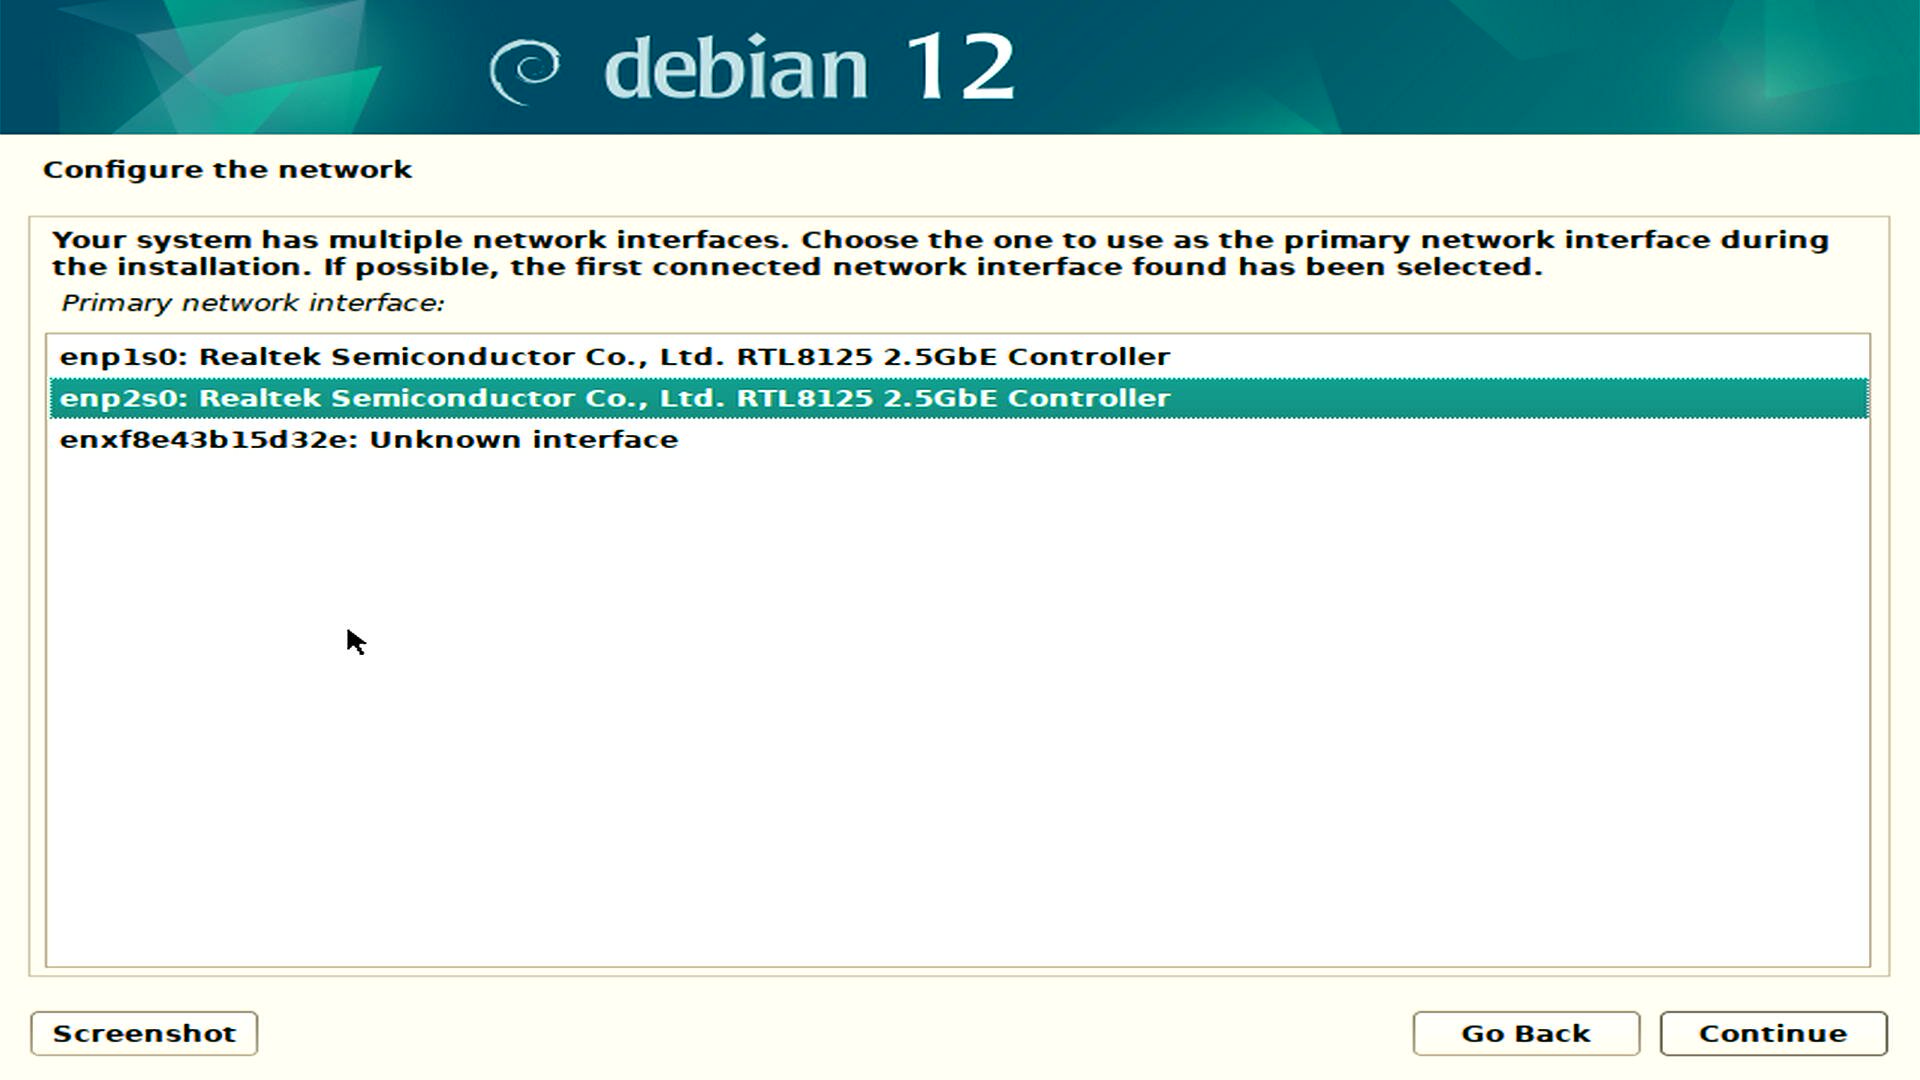
Follow the installation process, choosing your preferred settings until you reach the Network Configuration step. Here, configure your network interface with a static IP address, netmask, gateway, and DNS server address. I use Cloudflare DNS 1.1.1.1 on my installations for improved performance.
Partitioning
Proceed with the installation until you reach the Partition Disks section. Select the Manual partitioning method.
I’ve created a video to show how the configuration is done
Manual instructions
Create the following partitions:
- EFI Partition: 512 MB
- Use as: EFI System Partition.
- Encrypted Volume: 480 GB
- Use as: physical volume for encryption
- Erase data: no (this disk has never had anything sensitive on it)
- Boot Partition: use rest of the disk or set it to for example 2GB
- Use as: ext4
- Format the partition: yes,format it
- Mount point:
/boot - NOTE: In later parts of the Project we’ll remove the boot partition.
Enter the “Configure encrypted volumes” section.
- Check “Yes” to write changes to disk.
- Choose “Create encrypted volumes.”
- Select the crypto partition.
- On next screen, select “Finish.”
- Enter and confirm a strong encryption password.
Once the encrypted volume appears in the “Partition Disks” view, modify it:
- Use as: ext4
- Mount point:
/
Finally:
- “Finish partitioning and write changes to disk.”
- Choose “no” when asked about configuring swap.
- Choose “yes” to write the changes to the disk.
Software selection
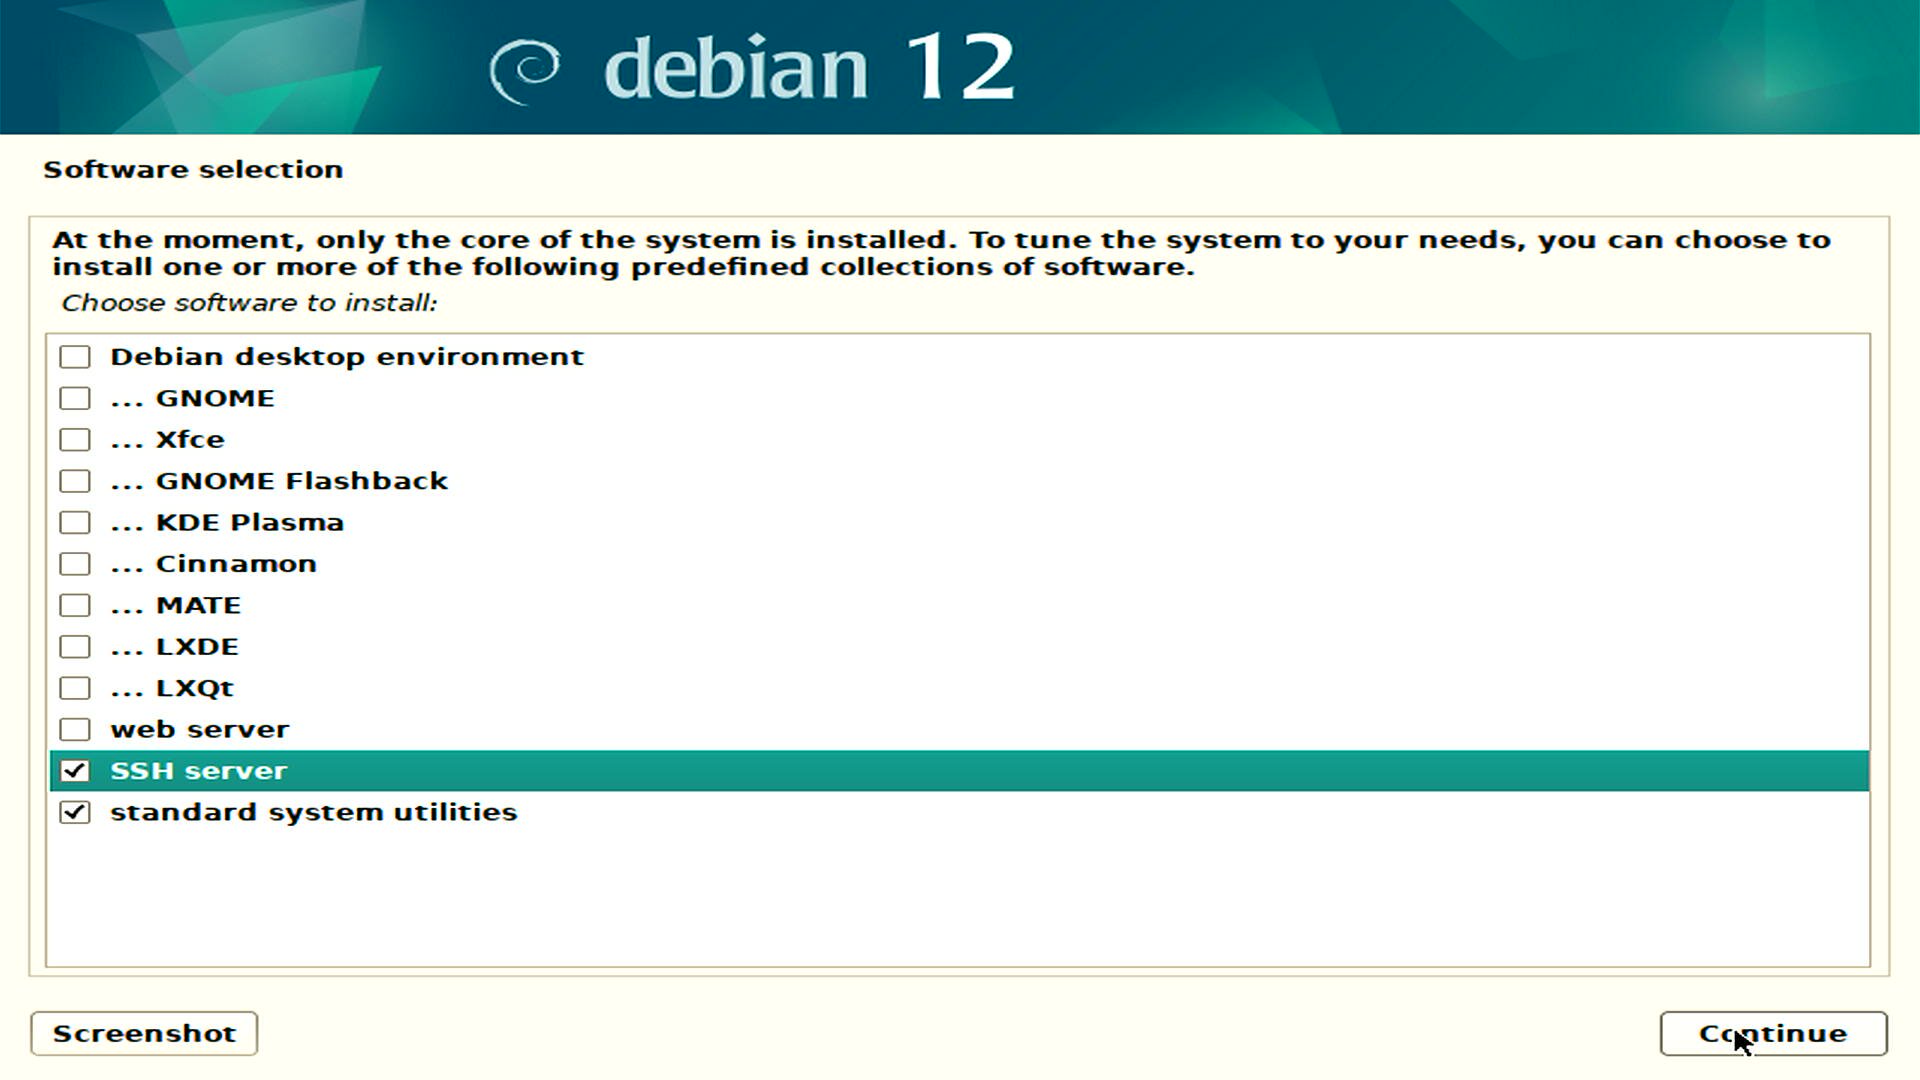
For Software selection choose SSH server and standard system utilities.
Once installation is complete, reboot the system and remove installation media.
Getting error “cryptsetup: Waiting for encrypted source device”

This error appears when reinstalling the system without formatting drives, the bootloader tries to run the configuration from previous installation. As a workaround, either enter to the Advanced options for Debian GNU/Linux from GRUB menu and choose other kernel or, alternatively reinstall the system and ensure EFI and boot partitions are formatted during installation.
Configuring SSH for first connection
It’s more convenient to continue the installation from a remote machine, and SSH is the perfect tool for this. However, SSH employs a TOFU (Trust on First Use) authentication scheme, requiring us to verify the connection when connecting to an unknown endpoint for the first time. Furthermore, the default OpenSSH server configuration relies on password authentication which is vulnerable to man-in-the-middle attacks.
While it’s unlikely my network has any malicious actors waiting to exploit my devices, I try to prioritize security best practices whenever possible.
Create and mount Encrypted volume
Following steps instructs on creating encrypted vault on an USB stick to store SSH-keys.
Log in as root on the Debian machine:
1
2
3
4
5
6
7
8
9
10
11
12
13
14
15
16
17
18
19
20
21
22
23
24
25
26
27
28
29
30
31
32
33
34
35
36
37
38
# Prepare the USB drive: (Skip steps 2 and 3 if you're not using the Debian installer USB)
# 1. Identify the USB drive with two partitions (/dev/sdb in my case)
lsblk

# 2. Create a new partition on the USB
fdisk /dev/sdb
    n (new partition)
    p (primary)
    3 (next available partition number)
    Press Enter to accept the default first sector.
    Press Enter to use all remaining free space.
    w (write changes and exit)

# 3. Format the new partition
mkfs.ext4 /dev/sdb3

# 4. Create a mount point and mount the partition
mount -m /dev/sdb3 /mnt/usb

# 5. Navigate to the mounted drive
cd /mnt/usb

# 6. Create an empty file for encrypted container (50 MB)
dd if=/dev/urandom of=pvekey.img bs=1M count=50

# 7. Create LUKS volume within the empty file
cryptsetup luksFormat pvekey.img

# 8. Open the LUKS volume and confirm it is visible in the system
cryptsetup open pvekey.img keyvault
ls /dev/mapper

# 9. Create filesystem labeled as keyvault
mkfs.ext4 -L keyvault /dev/mapper/keyvault

# 10. Create mount point for the keyvault, mount it and navigate to the mounted folder
mount -m /dev/mapper/keyvault /media/keyvault
cd /media/keyvault
Generate and enroll SSH keys
On the encrypted volume
1
2
3
4
5
6
7
8
9
10
11
12
13
14
15
16
17
18
19
20
21

# Retrieve and save the host key fingerprint
ssh-keygen -l -f /etc/ssh/ssh_host_ed25519_key >> host_fingerprint.txt

# Generate SSH keys (Use a strong password)
ssh-keygen -t ed25519 -f pve_key

# Create the SSH configuration folder for the non-admin user
mkdir /home/tanetzky/.ssh

# Add the public key to the user's authorized_keys file
cat pve_key.pub >> /home/tanetzky/.ssh/authorized_keys

# Give the user permissions to .ssh folder and files
chown -R tanetzky:tanetzky /home/tanetzky/.ssh/

# Finally, exit the folder and unmount drive.
cd /
umount /media/keyvault
cryptsetup close keyvault
umount /mnt/usb
First SSH Connection
Connect the USB drive to your PC and move pvekey.img on your hard drive.
On my Gnome Desktop I can mount the .img files via double clicking the file. After entering the password it is mounted.
Mount pvekey container in shell:
1
2
3
4
5
6
7
8
9
# 1. Open the LUKS container
sudo cryptsetup open --type luks pvekey.img keyvault

# 2. Mount
sudo mount -m /dev/mapper/keyvault /media/keyvault

# 3. Take ownership of keyvault files
sudo chown -R netzky:netzky /media/keyvault/
Connect via SSH
1
2
3
4
5
6
7
8
9
10
11
12
13
14
15
16
17
18
19
20
21
22
23
24
25
26
27
28
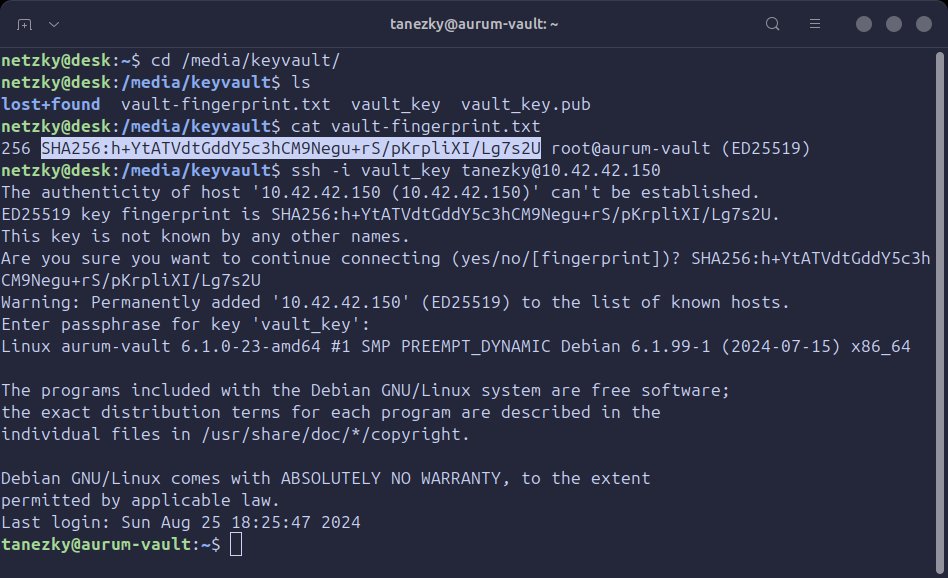
# 1. Navigate to the mounted location or open a new terminal in that folder
cd /media/keyvault
# 2. List files, there should be pve_key and vault-fingerprint.txt
ls
lost+found vault-fingerprint.txt pve_key pve_key.pub
# 3. Print contents of vault-fingerprint.txt
cat vault-fingerprint.txt
256 SHA256:5MrLeyQjuJCnThax3XKusvq6t7XvtSwiniEf/rJdYCQ root@pve-vault (ED25519)
# 4. Create SSH connection using pve_key
ssh tanezky@10.42.42.150 -i pve_key
The authenticity of host '10.42.42.150 (10.42.42.150)' can't be established.'
ED25519 key fingerprint is HA256:5MrLeyQjuJCnThax3XKusvq6t7XvtSwiniEf/rJdYCQ.
This key is not known by any other names.
# 5. Copy paste the SHA256 fingerprint from step 3
Are you sure you want to continue connecting (yes/no/[fingerprint])? SHA256:5MrLeyQjuJCnThax3XKusvq6t7XvtSwiniEf/rJdYCQ
Warning: Permanently added '10.42.42.150' (ED25519) to the list of known hosts.
# 6. Enter password for the pve_key
Enter passphrase for key 'pve_key':
# 7. Login complete
Linux pve-vault 6.1.0-37-amd64 #1 SMP PREEMPT_DYNAMIC Debian 6.1.140-1 (2025-05-22) x86_64
...
Make SSH easier
Typing the full ssh command with the key file every time can get tedious. To streamline this, it’s a good idea to create a configuration file that simplifies future connections.
1
2
3
4
5
6
7
8
9
10
11
12
13
14
15
16
# First, copy the private key in your .ssh folder
cp pve_key pve_key.pub /home/netzky/.ssh/

# Edit the local SSH config file on your PC
~/.ssh/config

# Add following content with your details
Host    pve-vault
        HostName 10.42.42.150
        User tanezky
        IdentityFile ~/.ssh/pve_key
        LogLevel INFO
        Compression yes

# Making connection is now much more straightforward
ssh pve-vault
Installing Proxmox
Preparation
Before installing the Proxmox, it is good to list all currently installed packages. This can be used for comparison later to see what new packages was installed.
1
2
3
4
5
6
# Save list of installed packages
dpkg --get-selections > packages_before_proxmox.txt
# Save detailed list of installed packages
apt list --installed > packages_before_proxmox_detailed.txt
# Save list of manually installed packages
apt-mark showmanual > manually_installed_before_proxmox.txt
Ensure /etc/hosts maps 127.0.1.1 only to localhost
1
2
3
4
5
6
7
8
9
10
11
12
# Become root, enter root password which was given during debian installation
su -

# Check /etc/hosts to be similar as below, edit if necessary
cat /etc/hosts
127.0.0.1	localhost
10.42.42.150	pve-vault.proxmox.com pve-vault

# The following lines are desirable for IPv6 capable hosts
::1     localhost ip6-localhost ip6-loopback
ff02::1 ip6-allnodes
ff02::2 ip6-allrouters
Verify hostname --ip-address returns the IP-address assigned during the Debian installation
1
2
root@pve-vault:~# hostname --ip-address
10.42.42.150
Repository
Add the Proxmox VE repository to apt sources
1
echo "deb [arch=amd64] http://download.proxmox.com/debian/pve bookworm pve-no-subscription" > /etc/apt/sources.list.d/pve-install-repo.list
Add Proxmox VE repository key
1
2
3
4
5
6
7
wget https://enterprise.proxmox.com/debian/proxmox-release-bookworm.gpg -O /etc/apt/trusted.gpg.d/proxmox-release-bookworm.gpg

# Verify checksum of the repository key
echo "7da6fe34168adc6e479327ba517796d4702fa2f8b4f0a9833f5ea6e6b48f6507a6da403a274fe201595edc86a84463d50383d07f64bdde2e3658108db7d6dc87 /etc/apt/trusted.gpg.d/proxmox-release-bookworm.gpg" | sha512sum -c

# Should output:
/etc/apt/trusted.gpg.d/proxmox-release-bookworm.gpg: OK
Sources and Packages
Update sources, run full-upgrade, install Proxmox VE kernel and reboot
1
apt update && apt full-upgrade -y && apt install -y proxmox-default-kernel && systemctl reboot
After reboot install Proxmox VE packages
1
apt install -y proxmox-ve postfix open-iscsi chrony
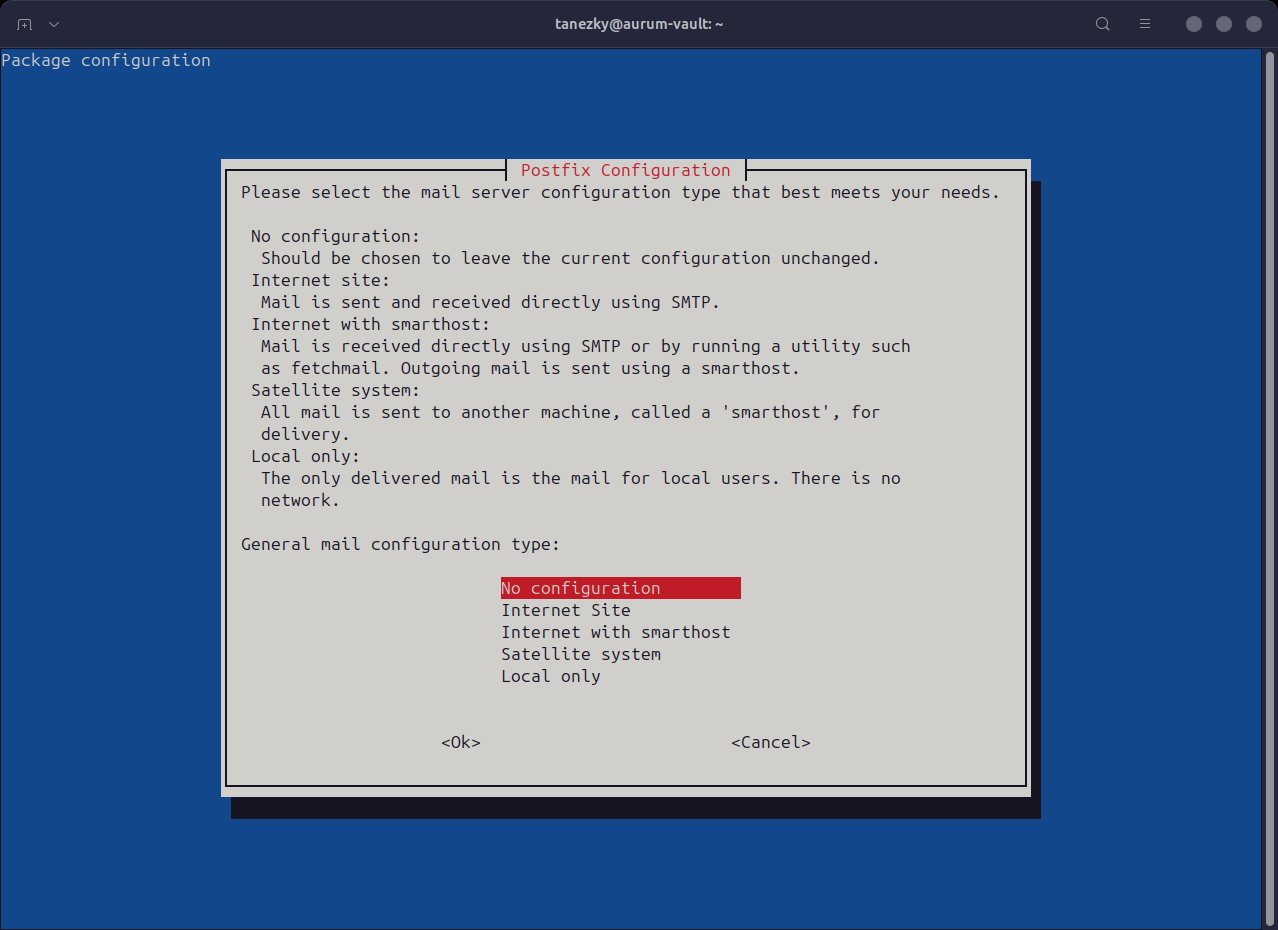 For Postfix Configuration I chose No configuration since I don’t have a mail server (yet).
Cleanup
After reboot, remove Debian kernel, unnecessary packages, update grub and remove subscription repository
1
2
3
4
5
6
7
8
# Remove kernel and unnecessary packages
apt remove -y linux-image-amd64 'linux-image-6.1*' os-prober

# Update grub and its config
update-grub

# Remove pve-enterprise.list (don't remove unless you have subscription)
rm /etc/apt/sources.list.d/pve-enterprise.list
Finalising Setup
Before adding network bridge, let’s create new lists of installed packages
1
2
3
4
5
6
7
8
# Save list of installed packages
dpkg --get-selections > packages_after_proxmox.txt
# Save detailed list of installed packages
apt list --installed > packages_after_proxmox_detailed.txt
# Save list of manually installed packages
apt-mark showmanual > manually_installed_after_proxmox.txt
# Comparison can be done with
diff -u file_before file_after
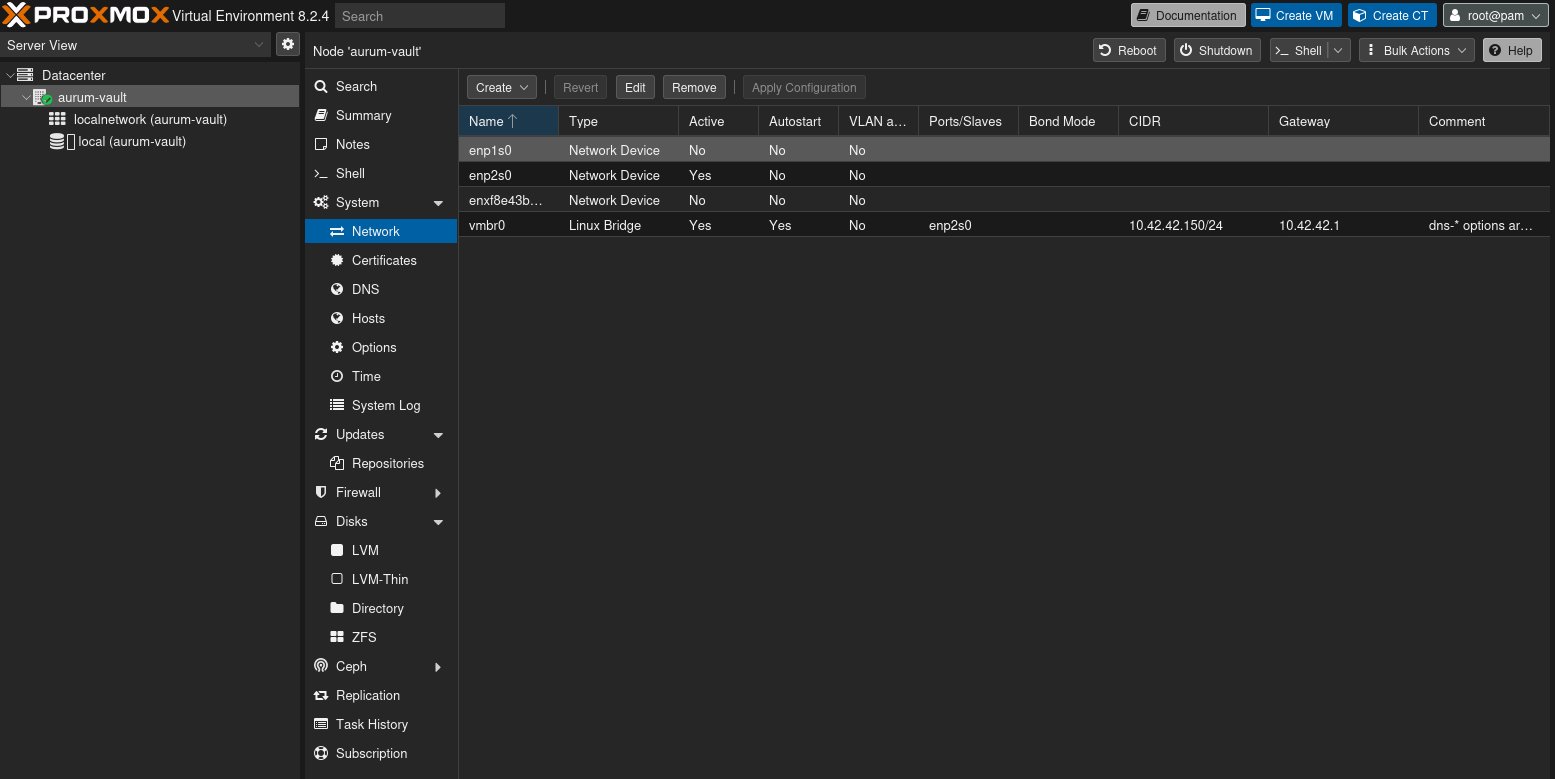
Add network bridge
Last thing on the list is to add network bridge, for time being I’m going to use default configuration.
More information on Proxmox Network configuration on their wiki page.
1
2
3
4
5
6
7
8
9
10
11
12
13
14
15
16
17
18
19
20
21
22
23
24
25
26
27
28
29
30
31
32
33
34
35
36
37
38
39
40
41
42
43
44
45
46
47
#
# Change /etc/network/interfaces from this:
....

source /etc/network/interfaces.d/*

auto lo
iface lo inet loopback

auto enp2s0
iface enp2s0 inet static
    address 10.42.42.150/24
    gateway 10.42.42.1
    dns-nameservers 1.1.1.1
# dns-* options are implemented by the resolvconf package, if installed

iface enp1s0 inet manual


#
# To look something like this:
...

source /etc/network/interfaces.d/*

auto lo
iface lo inet loopback

# Main network interface on Terramaster F4-424 Pro (upper)
iface enp2s0 inet manual

# Second network interface on Terramaster F4-424 Pro (lower)
iface enp1s0 inet manual

# Bridge configuration
auto vmbr0
iface vmbr0 inet static
    address 10.42.42.150/24
    gateway 10.42.42.1
    bridge-ports enp2s0
    bridge-stp off
    bridge-fd 0


#
# After saving. reboot the system
systemctl reboot
Admin Web-interface
Installation is complete, it’s time to start using the new setup.
Go to admin web-interface https://10.42.42.150:8006
Use your root credentials and Realm: Linux PAM standard authentication
Page updates
- 29.12.2024 - Update Postfix Configuration, add reboot instruction to cleanup.
- 25.06.2025 - Whole post was reviewed and updated