Choosing and Installing the Storage
A Storage strategy and disk installation on Terramaster F4-424 Pro NAS device
Requirements
I had a few key requirements in mind for storage
- Capacity: A minimum of 16 TB of usable disk space to accommodate current and future storage needs.
- Redundancy: Disk failure protection (software RAID-Z)
- User Quotas: Enough storage quota for 8 users, with a minimum of 1-2TB per user.
- Future Expandability: The ability to expand into a geographically redundant setup (3-2-1).
Storage Strategy
After some research, I’ve decided to give ZFS a try. The native encryption, on-the-fly compression, and snapshotting features are too compelling to ignore. However, as I continue testing the NAS, this storage strategy might evolve.
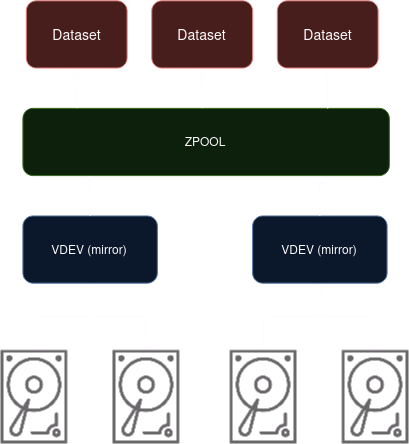
My initial plan is to utilize four drives for storage, organized into two vdevs (virtual devices), with each vdev comprising a mirrored pair of hard drives (similar to RAID 10) within a single zpool. This configuration prioritizes performance and redundancy. Each vdev can operate independently, effectively doubling potential read and write speeds compared to a single RAIDZ1 configuration. Additionally, if one drive fails within a vdev, the other drive maintains data accessibility, and the pool can be rebuilt (resilvered) without downtime.
For the operating system, services, and other data that needs quick access, I’ll dedicate one NVMe drive. ZFS won’t be necessary for this drive, as support for OS installation on ZFS varies across Linux distributions.
HDD Research
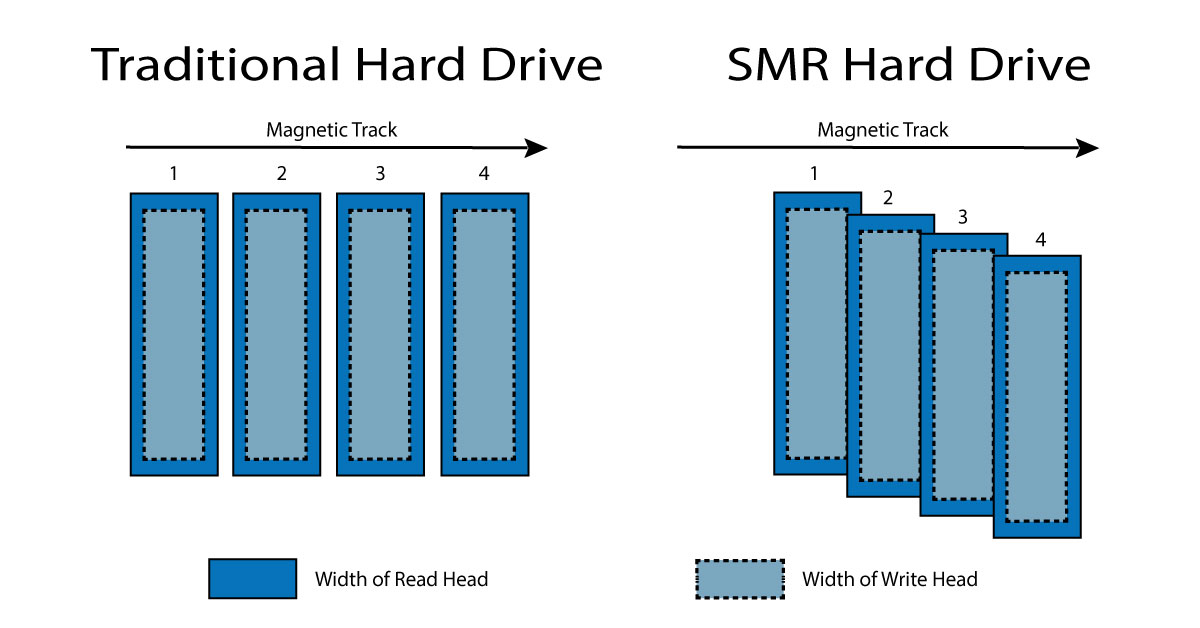 CMR vs SMR. Source: Buffalo Americas 1
Given the high storage capacity requirements for my homelab, NVMe or SSDs were quickly ruled out due to cost. After revisiting different storage solutions and delving into the world of hard disks, it became clear that Conventional Magnetic Recording (CMR) was the way to go, avoiding Shingled Magnetic Recording (SMR) at all costs.
To understand why, let’s look at how these technologies work. High-capacity hard drives consist of stacked platters, with more platters equating to more capacity. Each platter has tracks for data storage. On CMR disks, there are gaps between these tracks, while on SMR drives, the tracks overlap, increasing data density. This allows for higher capacity disks with fewer platters, ultimately lowering manufacturing costs and making SMR drives cheaper than CMR.
However, SMR comes with a significant speed penalty. Due to the overlapping tracks, SMR drives first store data in a temporary location and later write it to its final, overlapping position. This leads to considerably slower transfer speeds compared to CMR, especially for constant access scenarios where the drive lacks time to reorganize data. In a NAS environment, where parity is typically used across disks, the resilvering process (rebuilding data after a drive failure) can become excruciatingly slow with SMR drives.2 While SMR may be suitable for archival purposes where data access is infrequent1, its performance limitations make it unsuitable for a NAS device.
Choosing HDD
With the storage technology (CMR) decided, it was time to select the specific hard drives. My criteria were straightforward: CMR technology, designed for NAS usage, positive user reviews, and avoiding refurbished disks.
After extensive research, I narrowed down my options to four potential HDD lineups: WD Red Plus, WD Red Pro, Seagate Ironwolf, and Toshiba N300. WD Red Plus and Pro exceeded my budget, while the Toshiba N300 had concerning customer reviews citing failures within months of use.
Seagate Ironwolf seemed like a strong contender, with good reviews and widespread recommendations. While searching for deals on Ironwolf disks, I stumbled upon a great offer for the Seagate Exos X18 16 TB. Despite being slightly pricier than Ironwolf, its enterprise-grade features and specifications convinced me to invest in it.
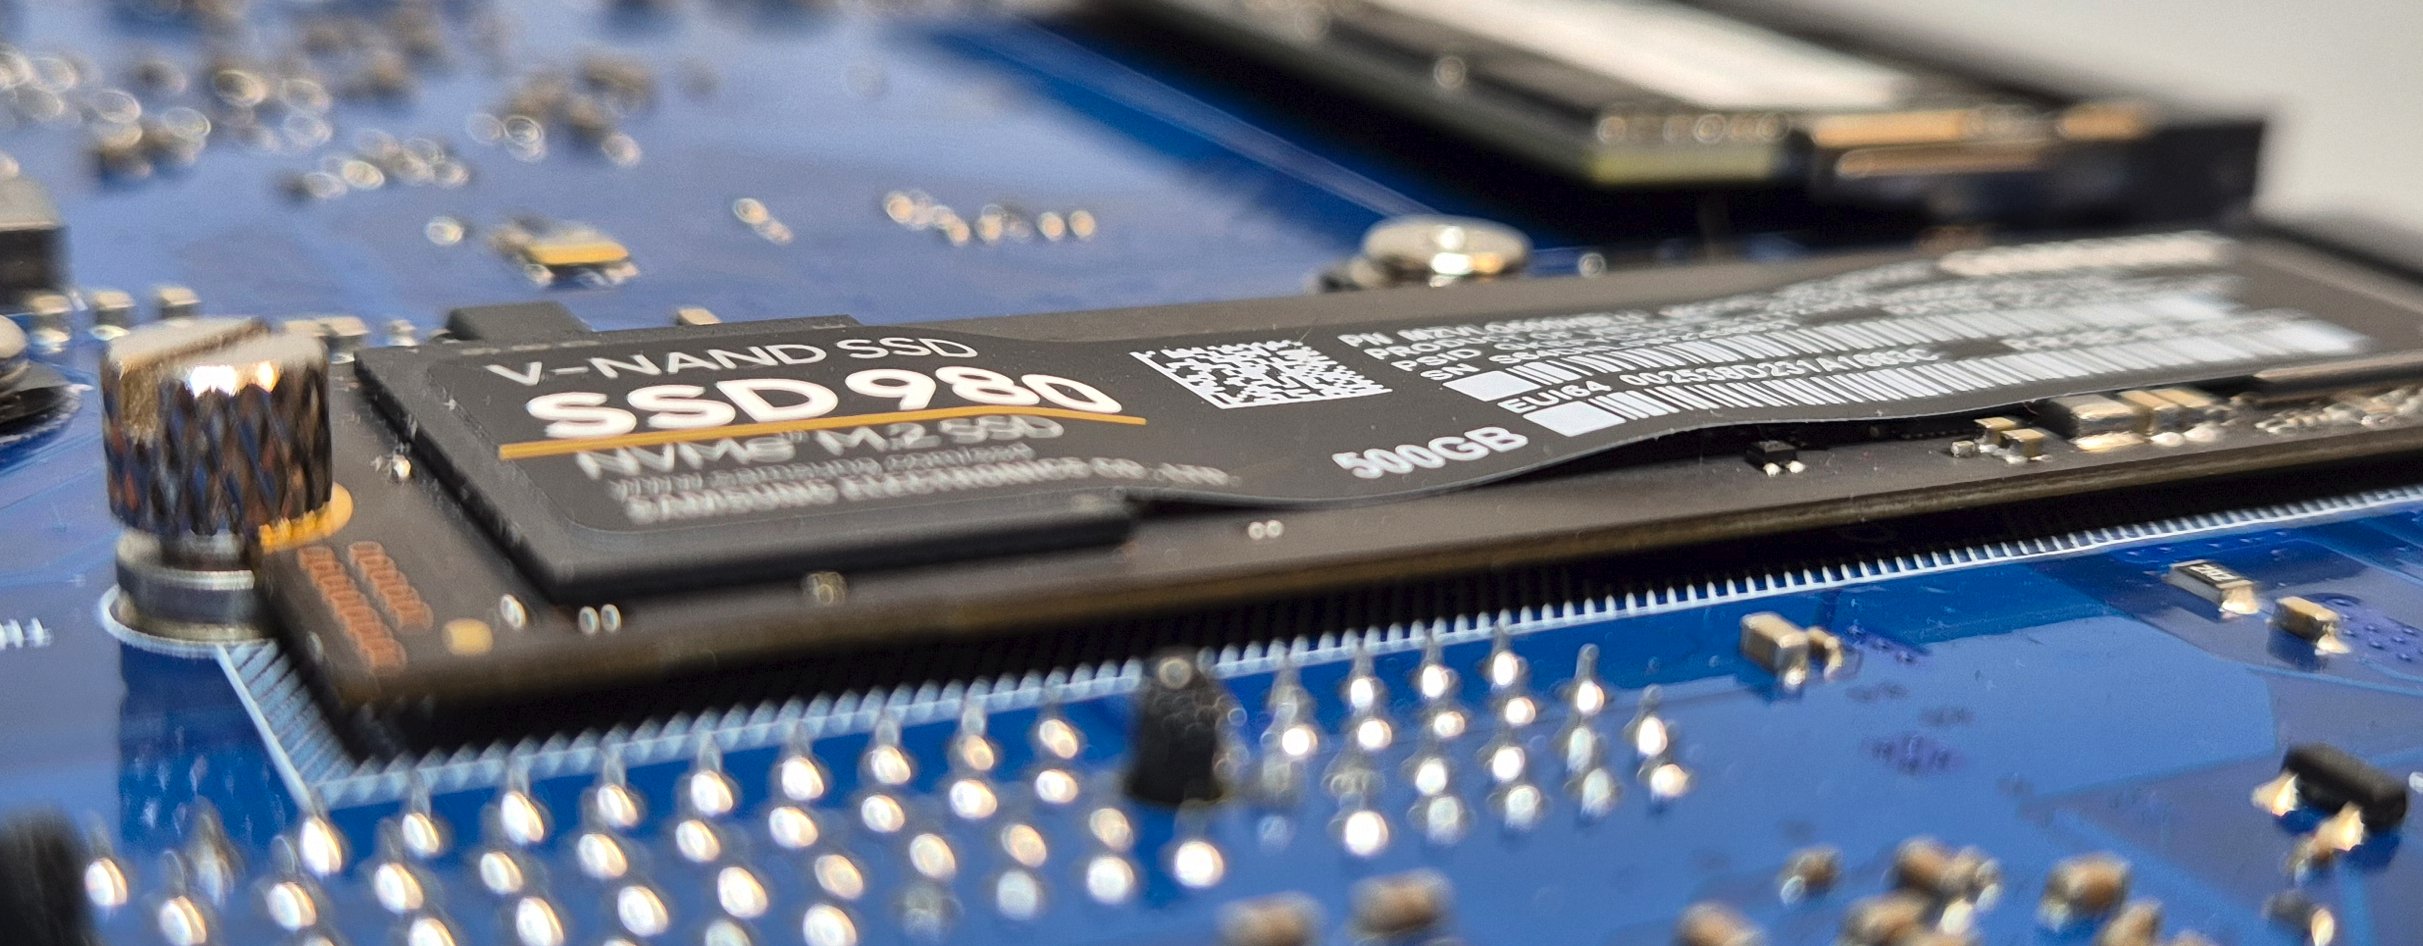
NVMe for OS
My positive experiences with Samsung NVMe drives in my desktop computer led me to choose the Samsung V-NAND SSD 980 for the NAS. I opted for the 500 GB model, the most affordable PCIe 3.0 option that still delivers sufficient read and write speeds for the operating system and essential services.
While marketed as “3bit MLC,” which is effectively TLC (triple-level cell) technology, Samsung offers a 5-year warranty and a generous 300 TBW (terabytes written) rating. This seemed a good choice for my NAS usage, and I’m optimistic about its longevity.
USB
For the internal USB connector, I picked up a thumb drive to use primarily for testing utilities and additional storage during experimentation. I went for the smallest option available, a Samsung FIT Plus with 64GB capacity. The datasheet indicates it can withstand operating temperatures up to 60°C, which should be enough for my needs.
Overview of Disks
| Port | Device | Datasheet |
|---|---|---|
| USB2 | Samsung FIT Plus | Link |
| SATA1 | Seagate Exos X18 | Link |
| SATA2 | Seagate Exos X18 | Link |
| SATA3 | Seagate Exos X18 | Link |
| SATA4 | Seagate Exos X18 | Link |
| M.2_SSD_1 | Samsung SSD980 | Link |
| M.2_SSD_2 | Empty |
Installing Disks and Observations
USB
The space allotted for the USB thumb drive is remarkably tight, requiring the removal of a motherboard support leg to fit the Samsung thumb drive. Even then, clearance is minimal, and a longer thumb drive would simply not fit.
 Closer look, there’s no space left
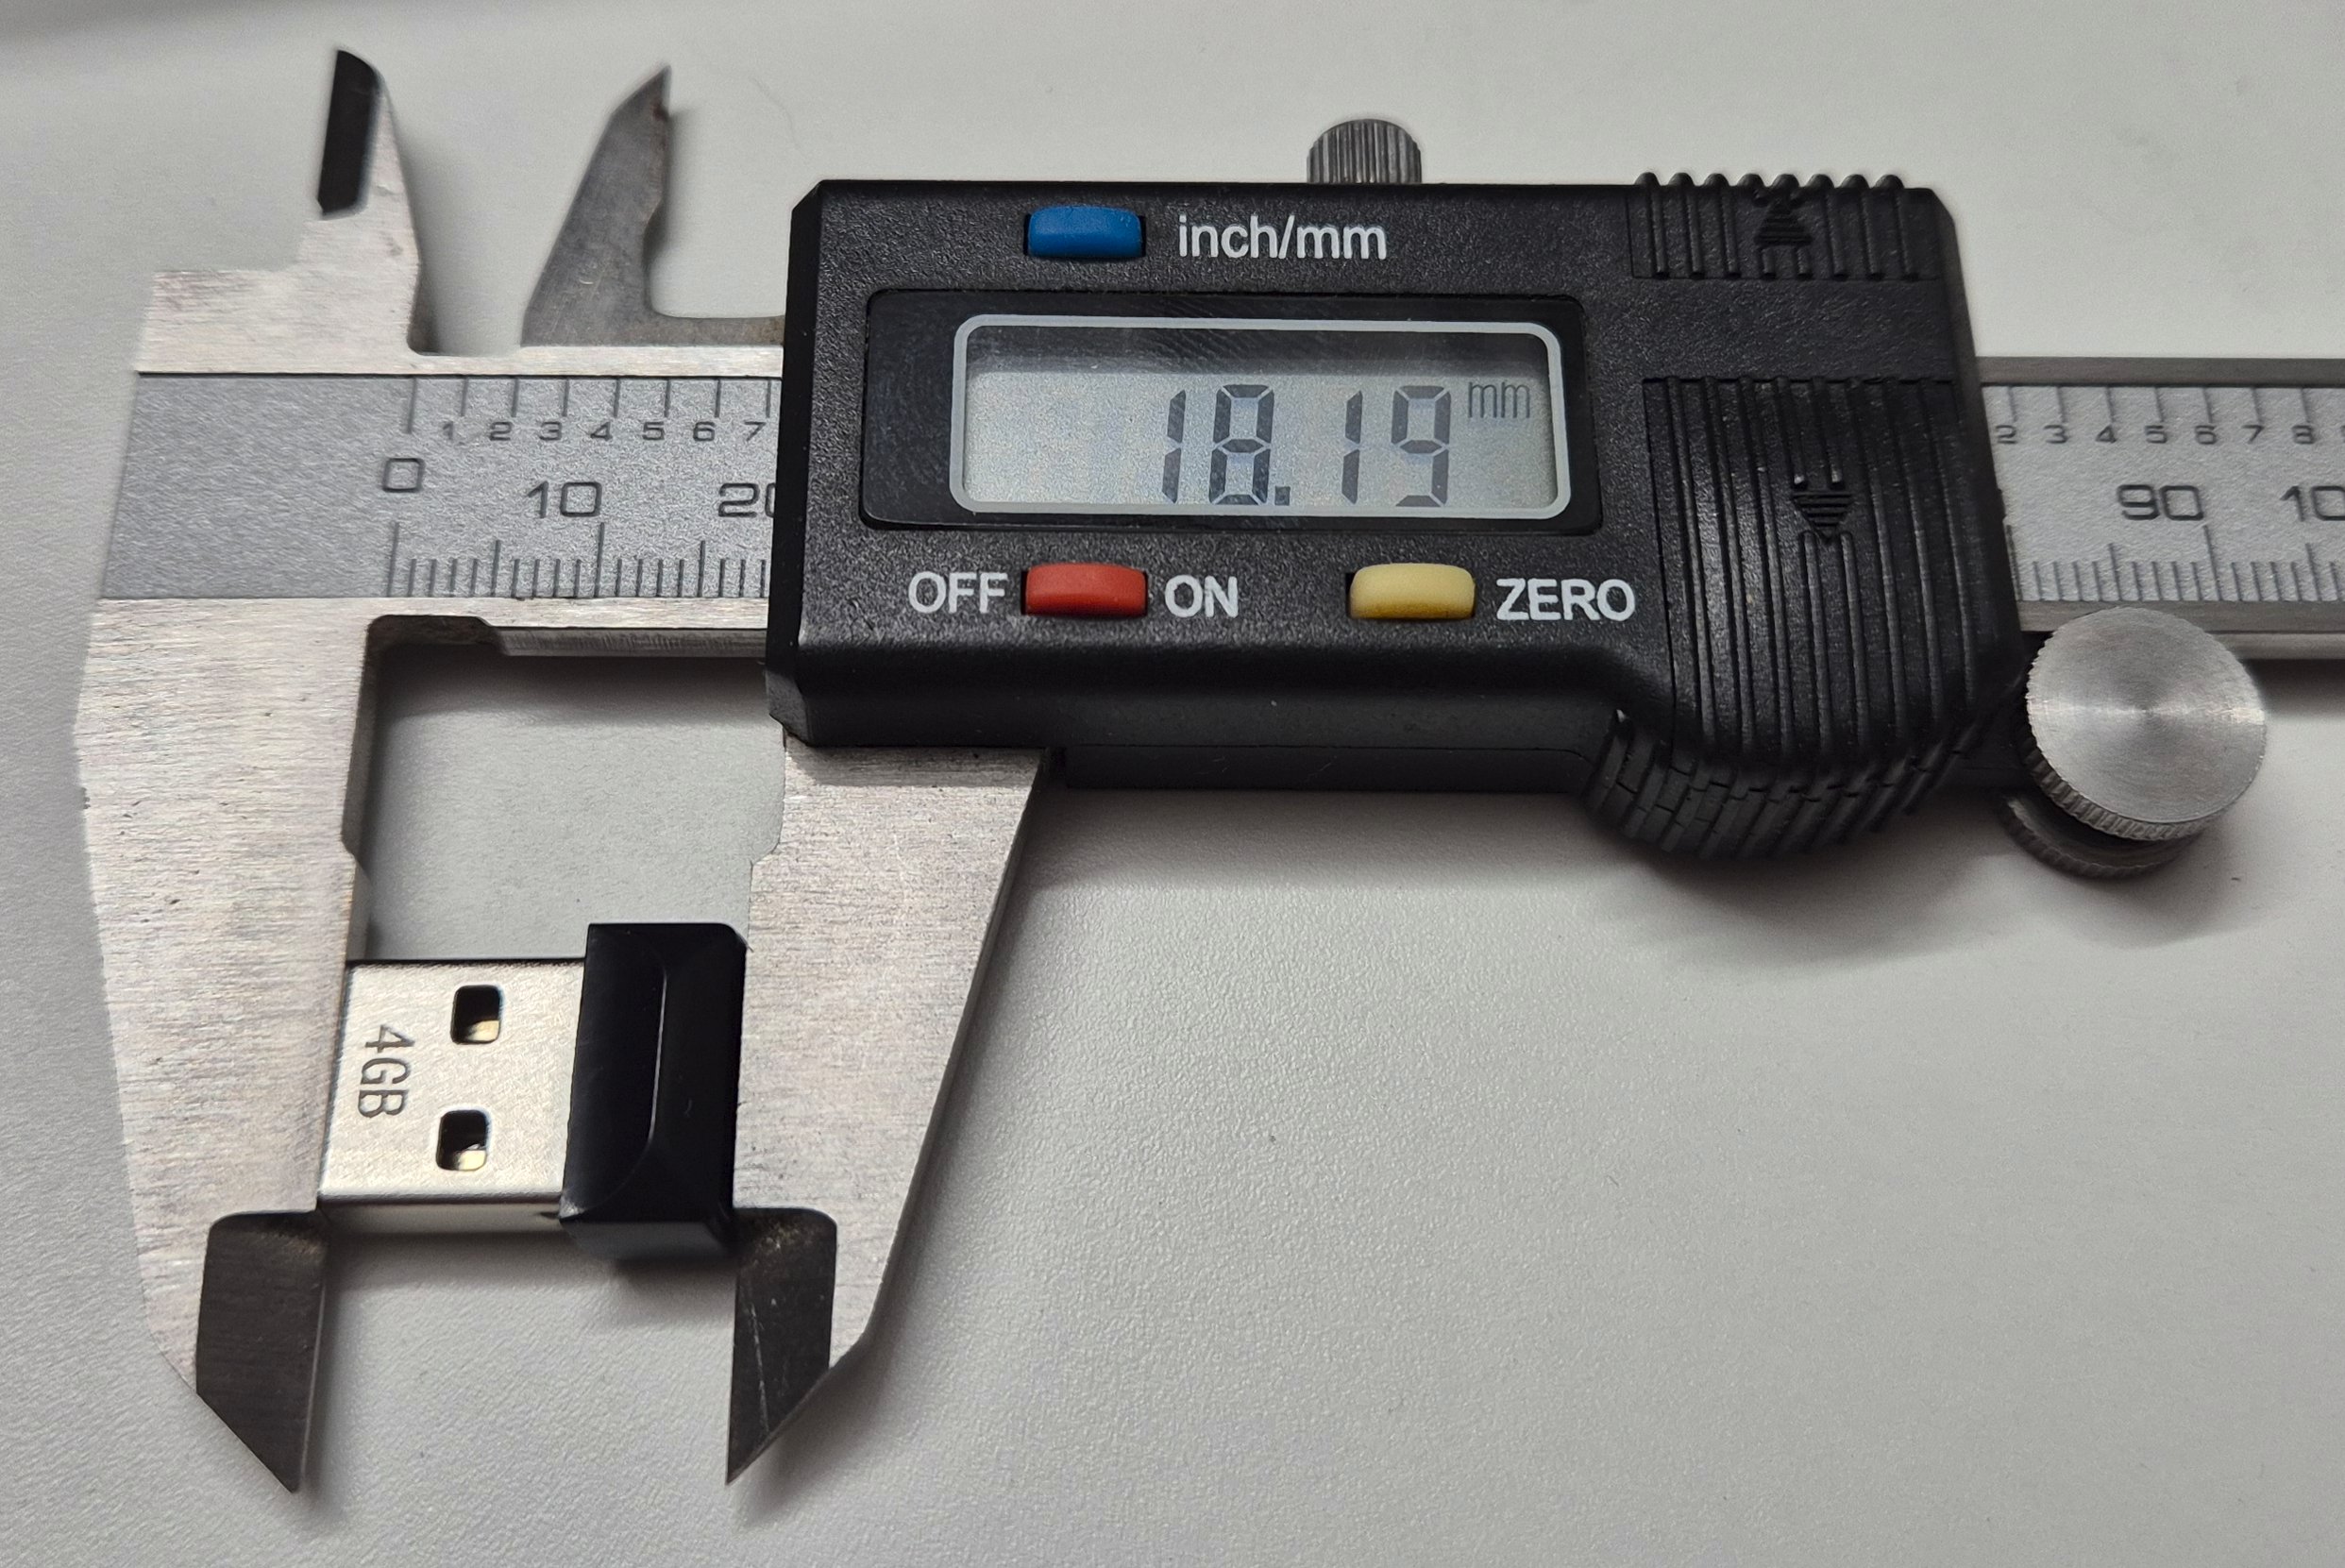 Terramaster USB thumb drive is 18.19 mm long
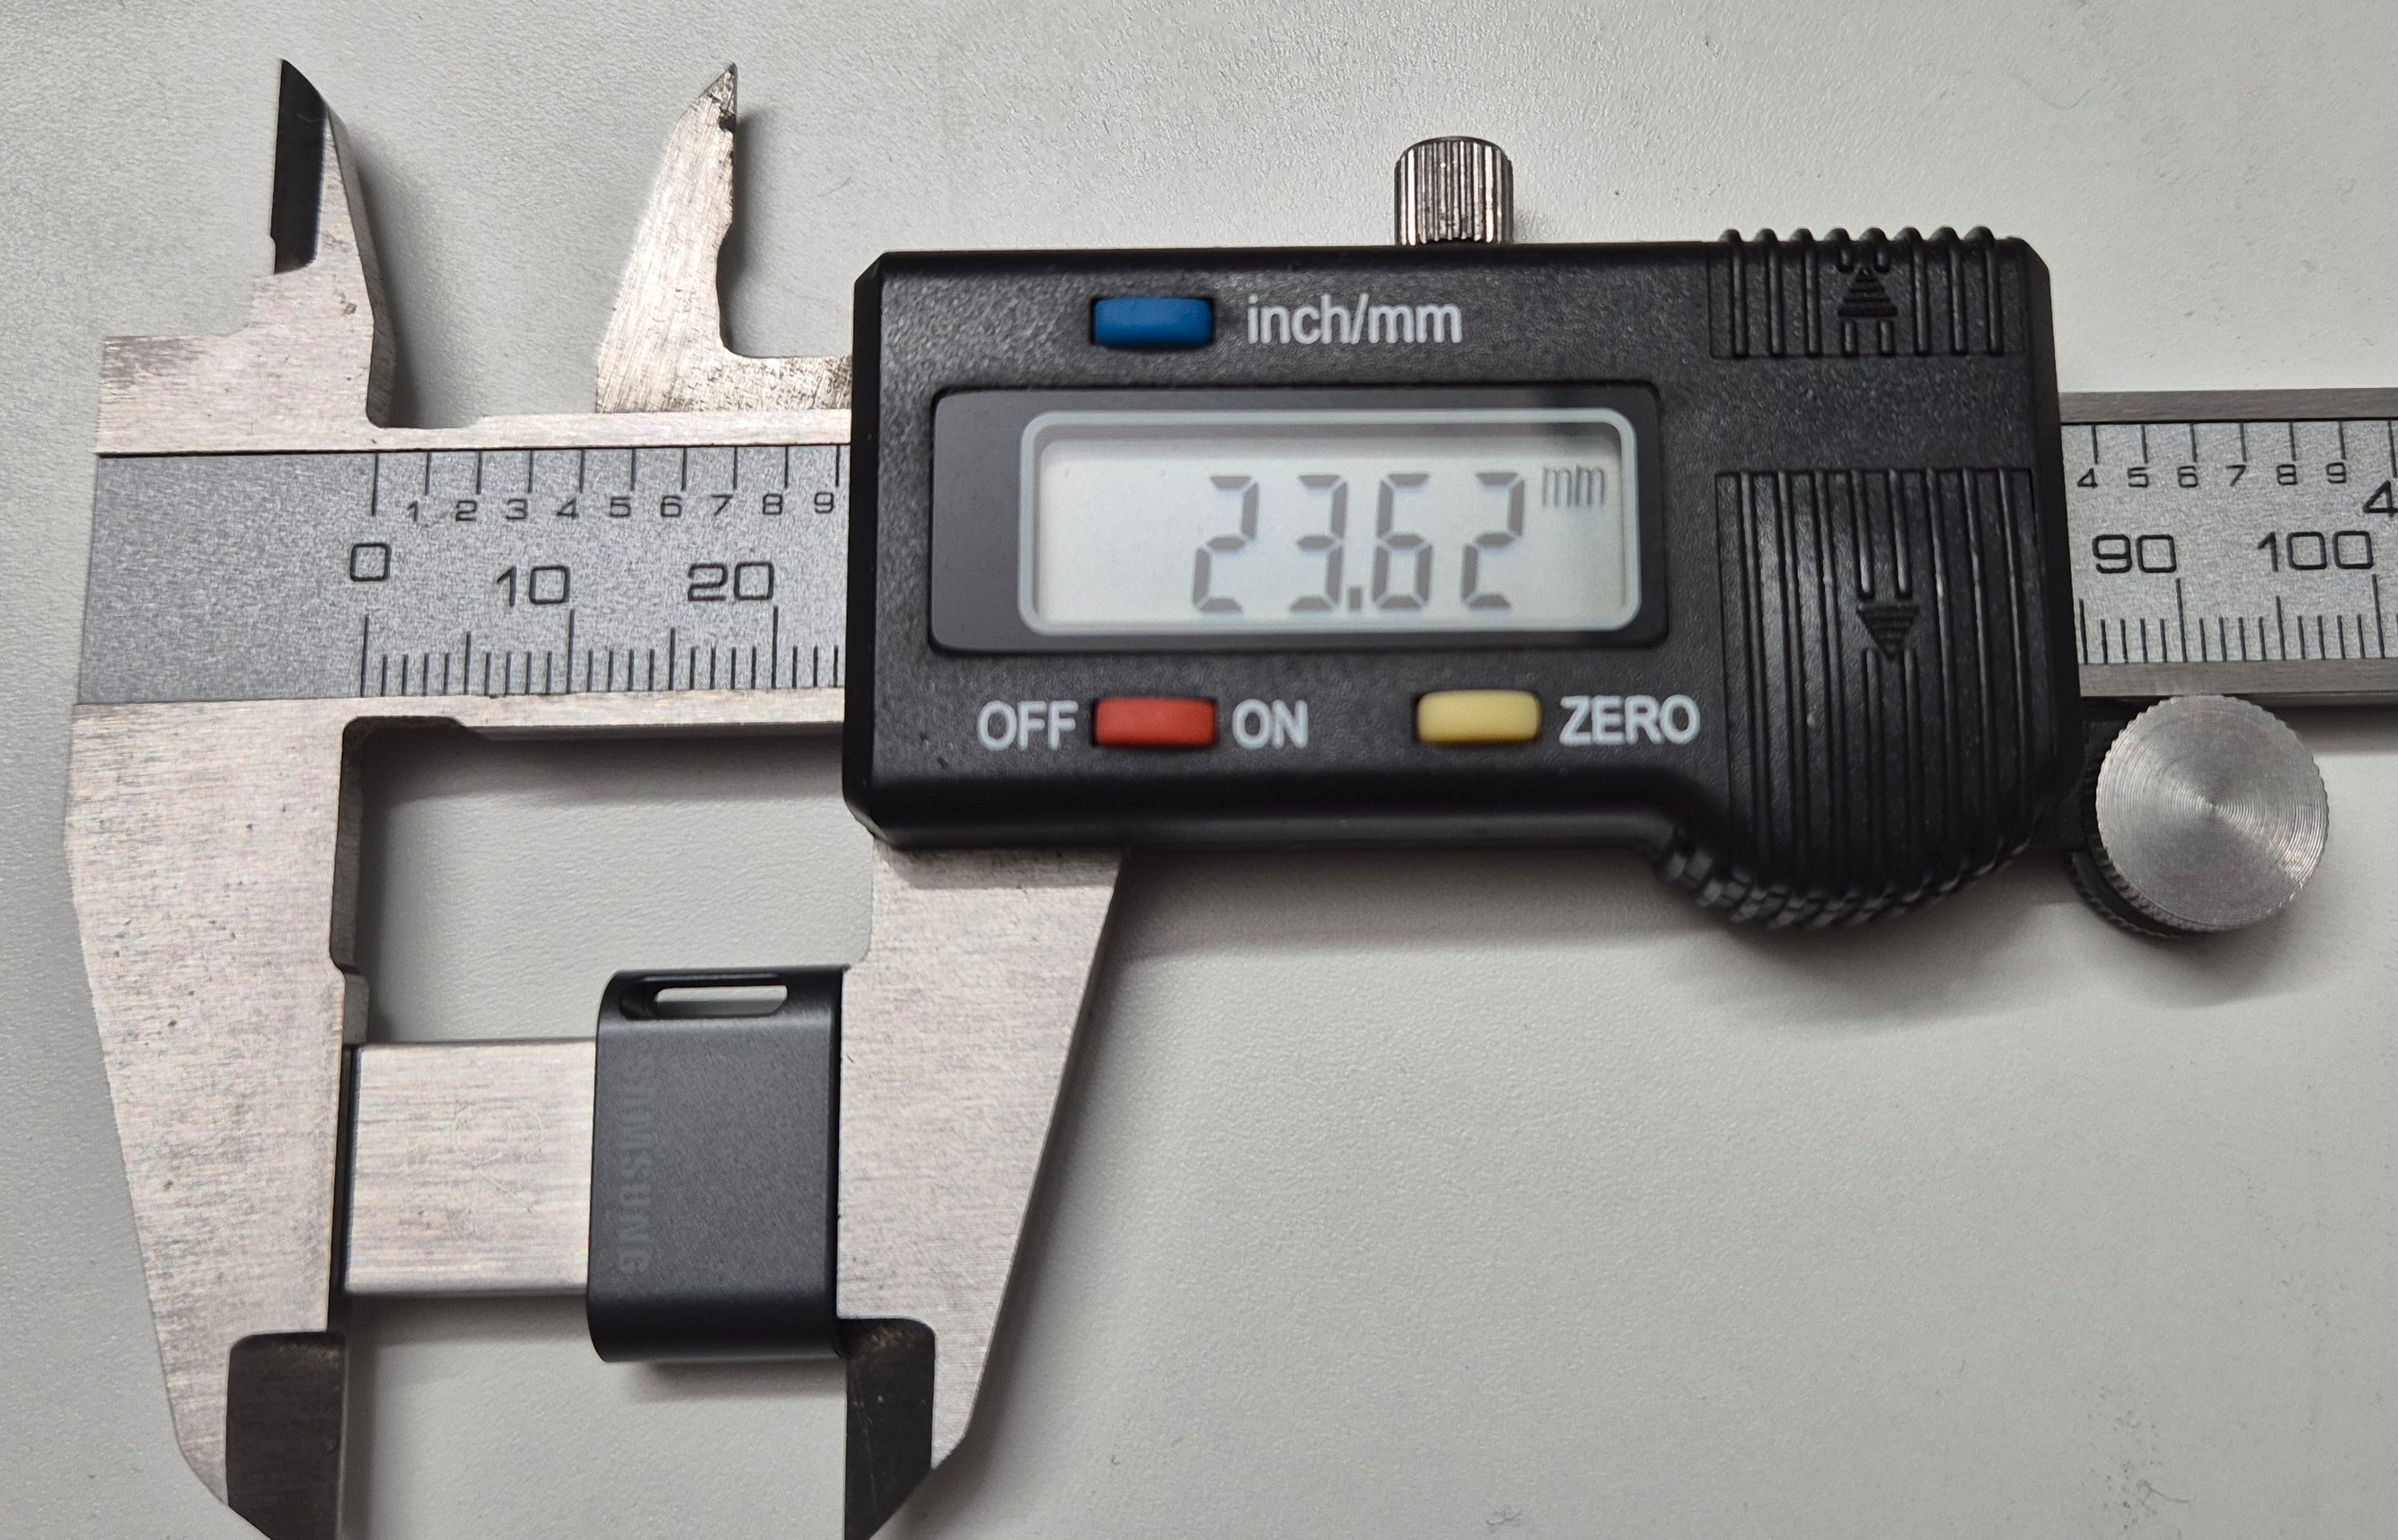 Samsung FIT USB thumb drive is 23.62 mm long
Hard Drives
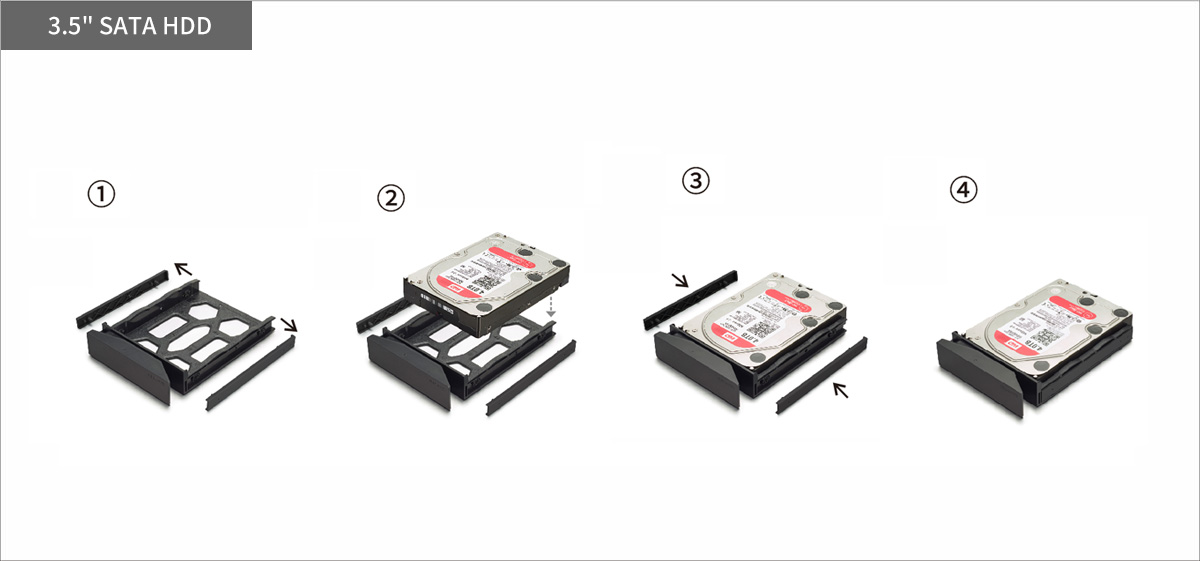 Terramaster HDD installation instruction
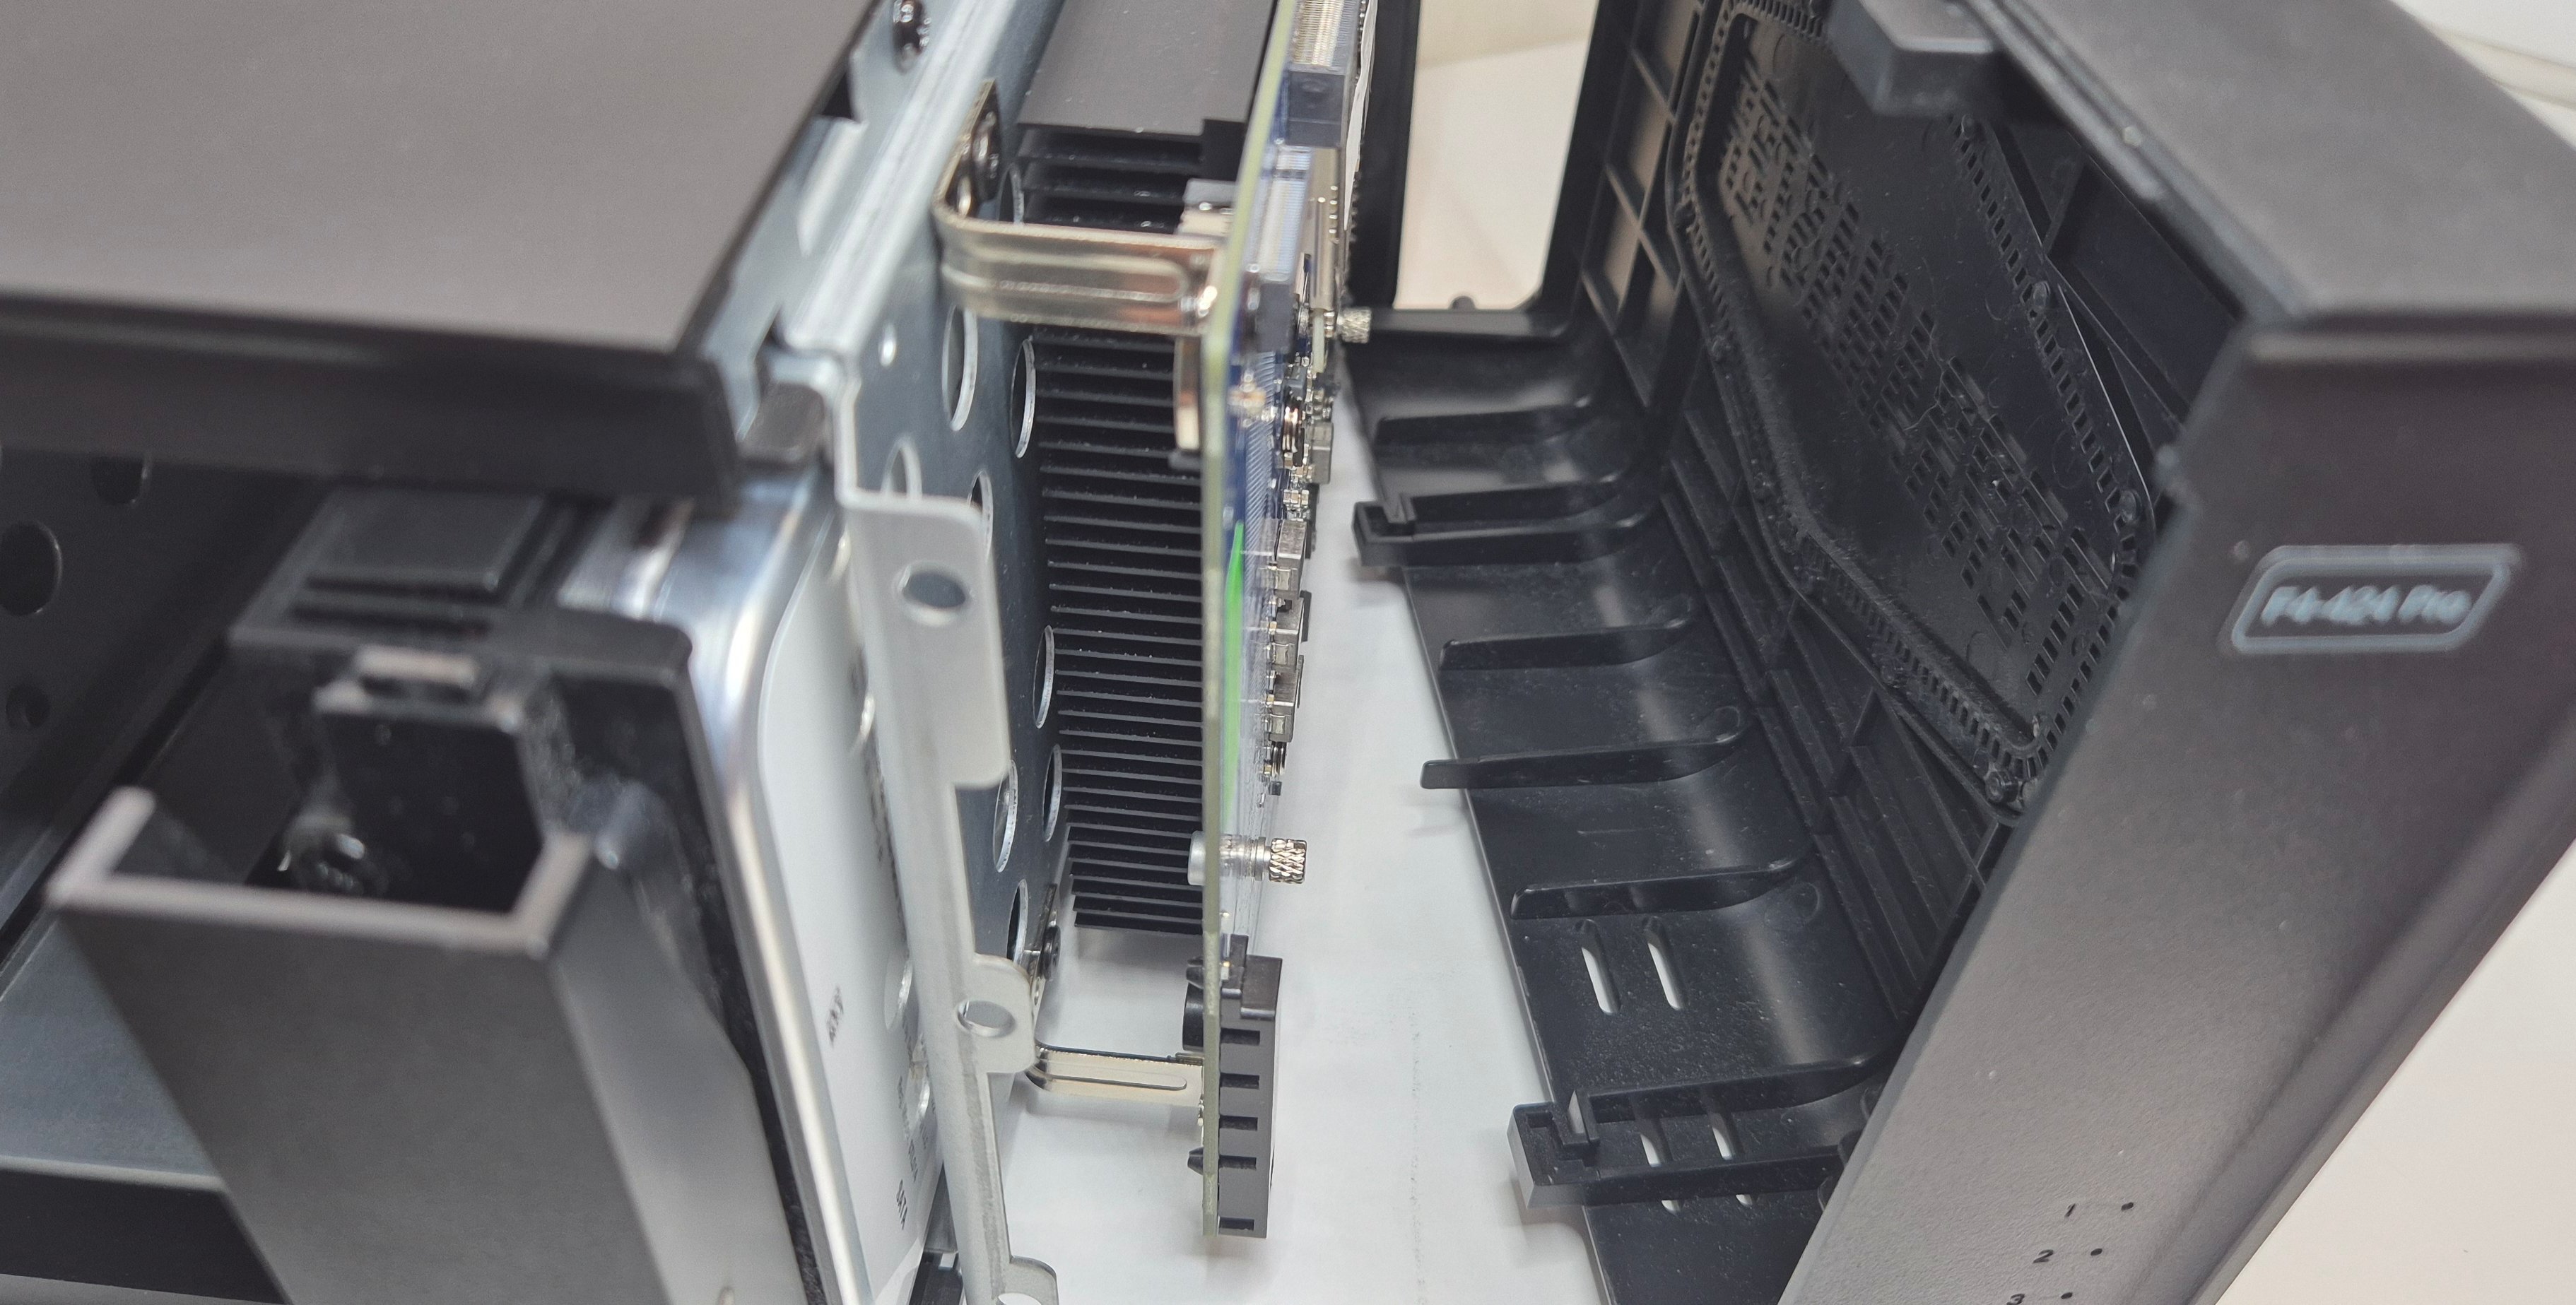
The hard drives are installed without screws, and once in place, a small gap remains between them, allowing for airflow from the front to the back of the device.
 Closer look to gaps between HDDs
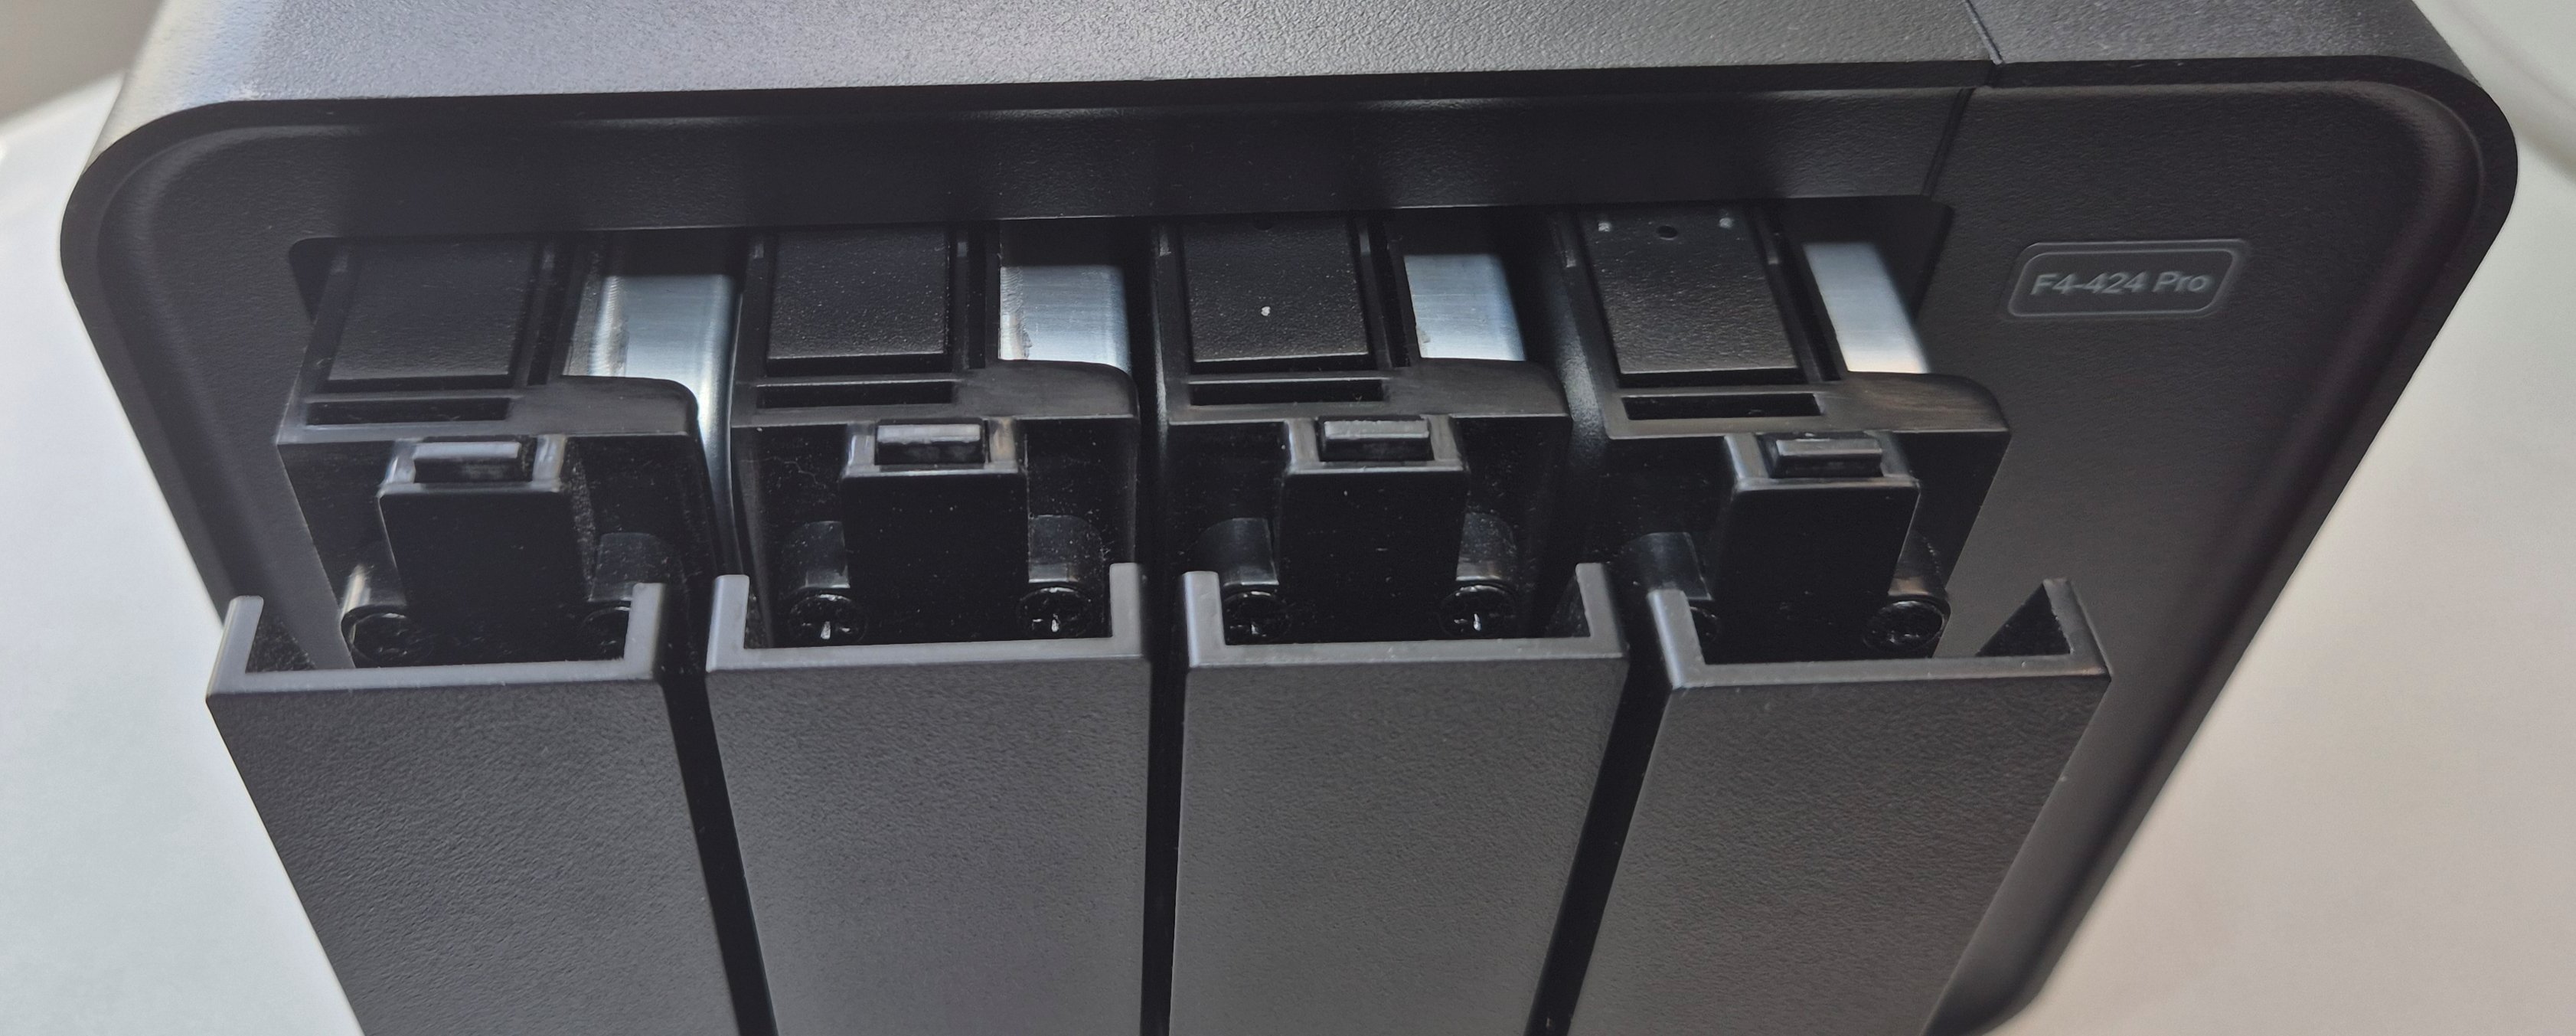
 HDDs installed
Air Circulation and CPU Heatsink
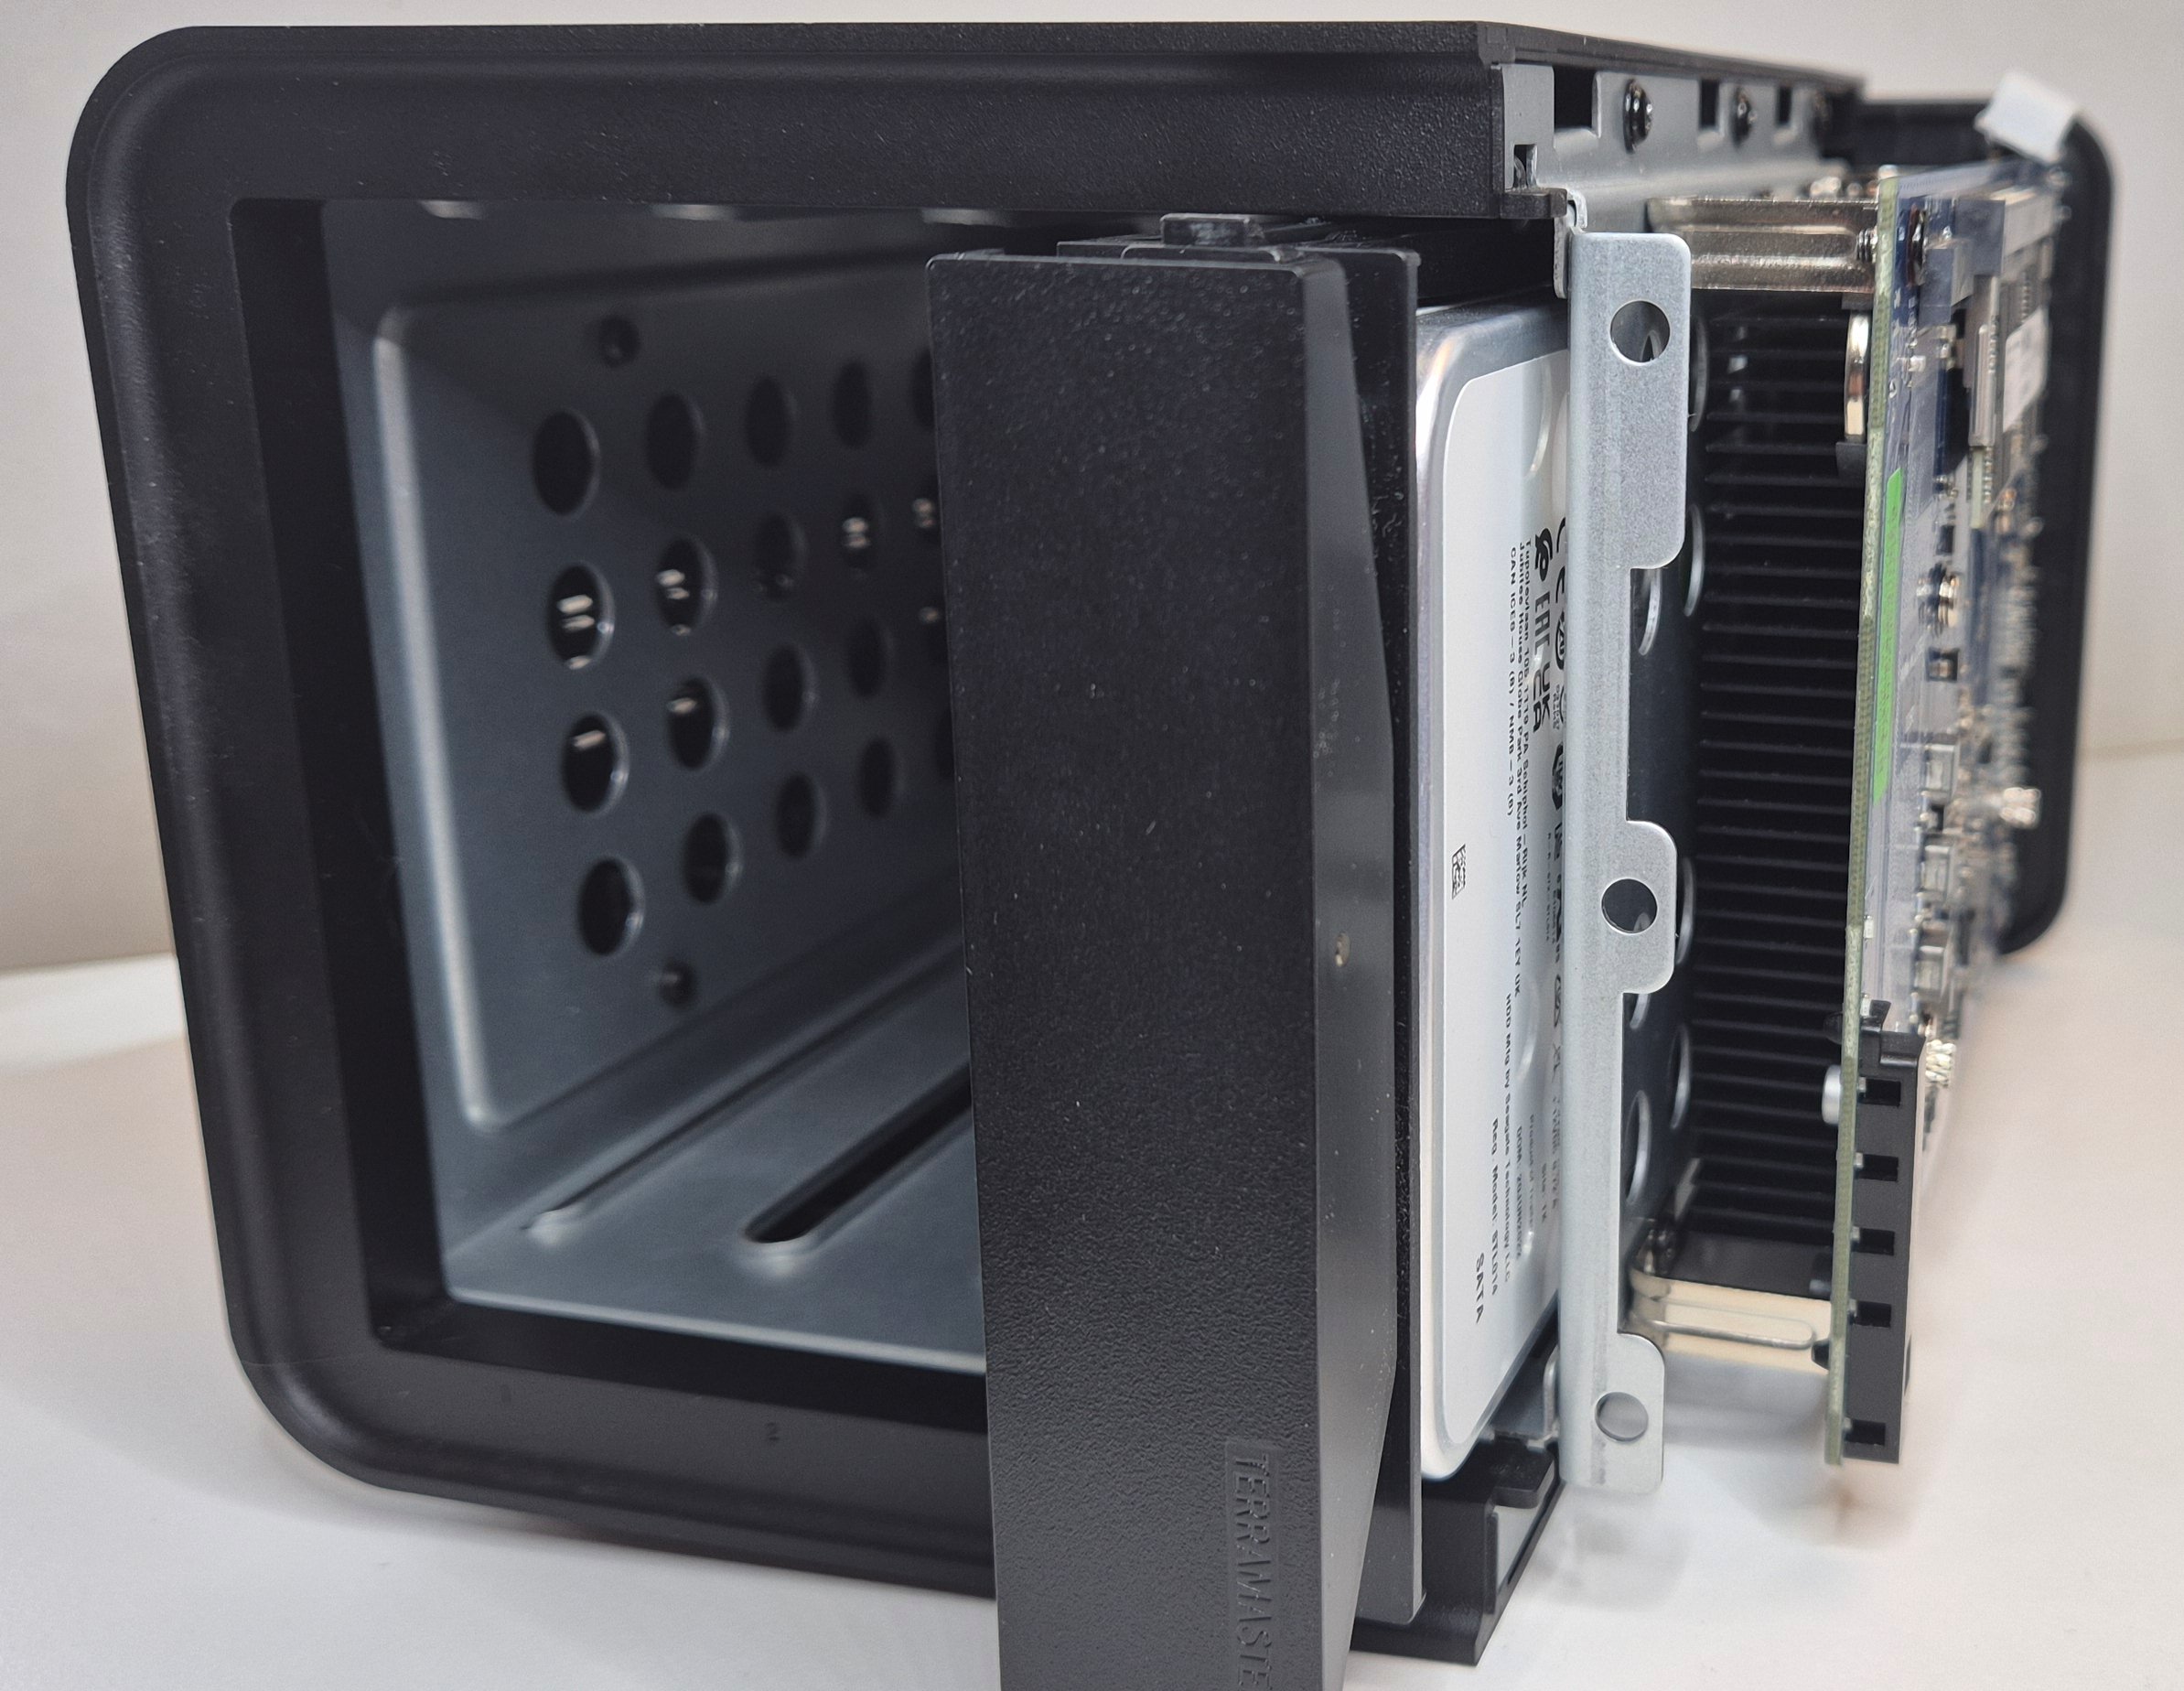 HDD installed in bay 4
The proximity of the hard drive in bay 4 to the CPU heatsink raises concerns about potential heat buildup. The ventilation holes underneath the enclosure might not provide sufficient airflow, and the 25mm thick fan at the back might not adequately cool the heatsink, especially under heavy load. A thinner 15mm fan could potentially improve airflow and cooling in this area but it is unlikely to find any slimmer models with equivalent airflow specifications. The effectiveness of the current cooling solution and the potential for overheating will require monitoring during operation, particularly under heavy workloads.
 25mm fan in back
 Ventilation holes for motherboard
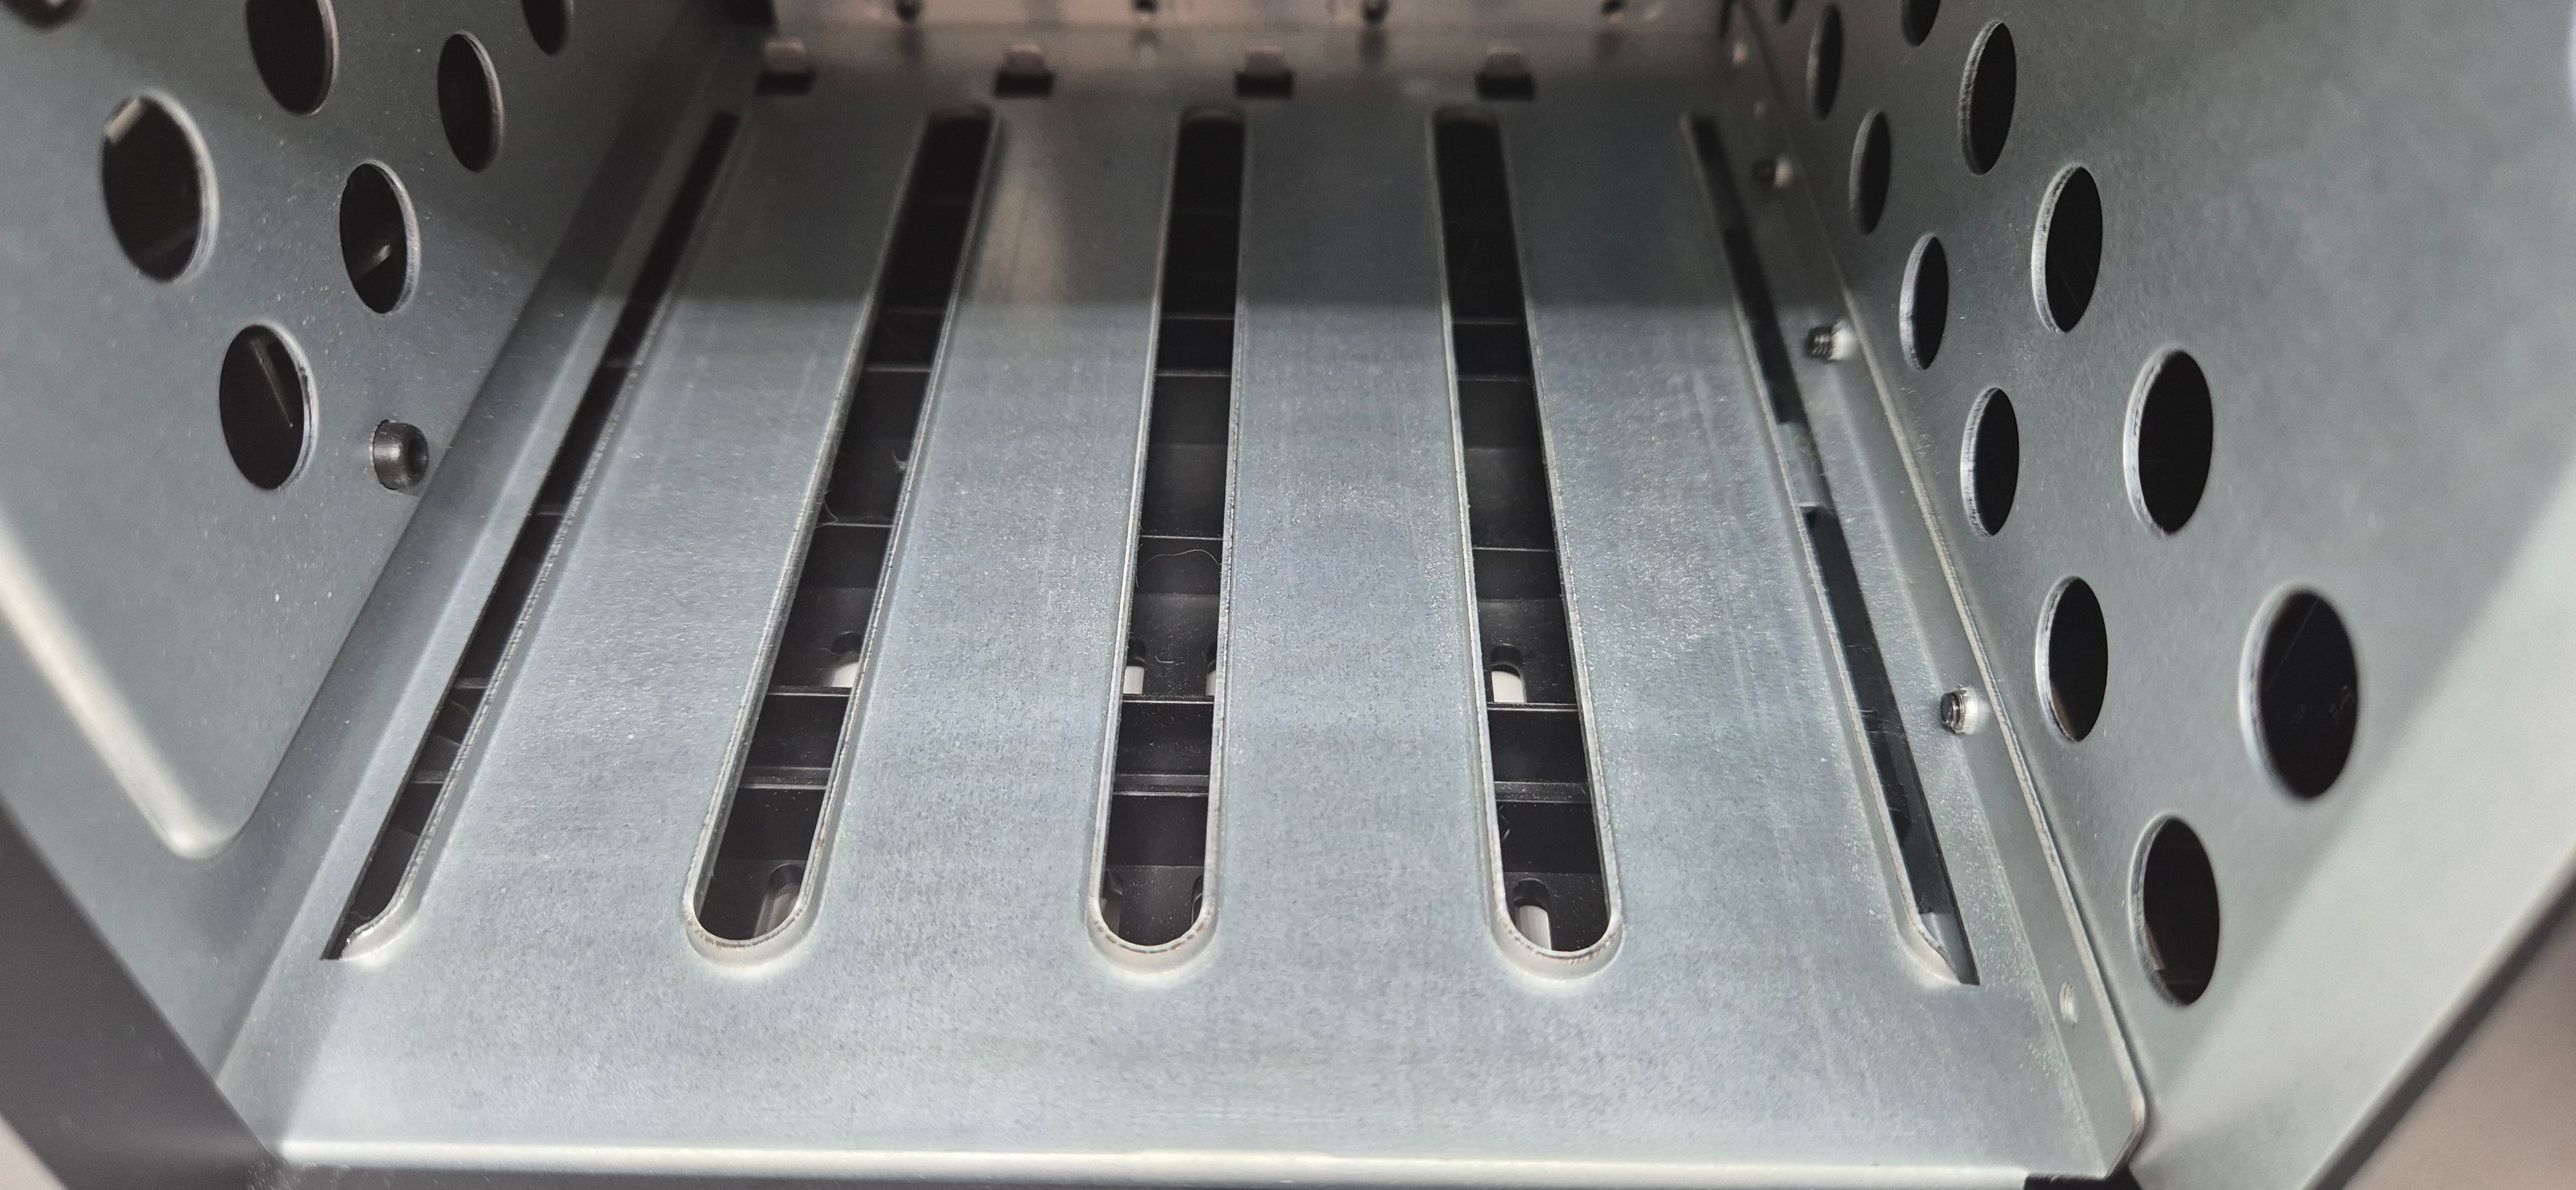 Ventilation holes under drive bays
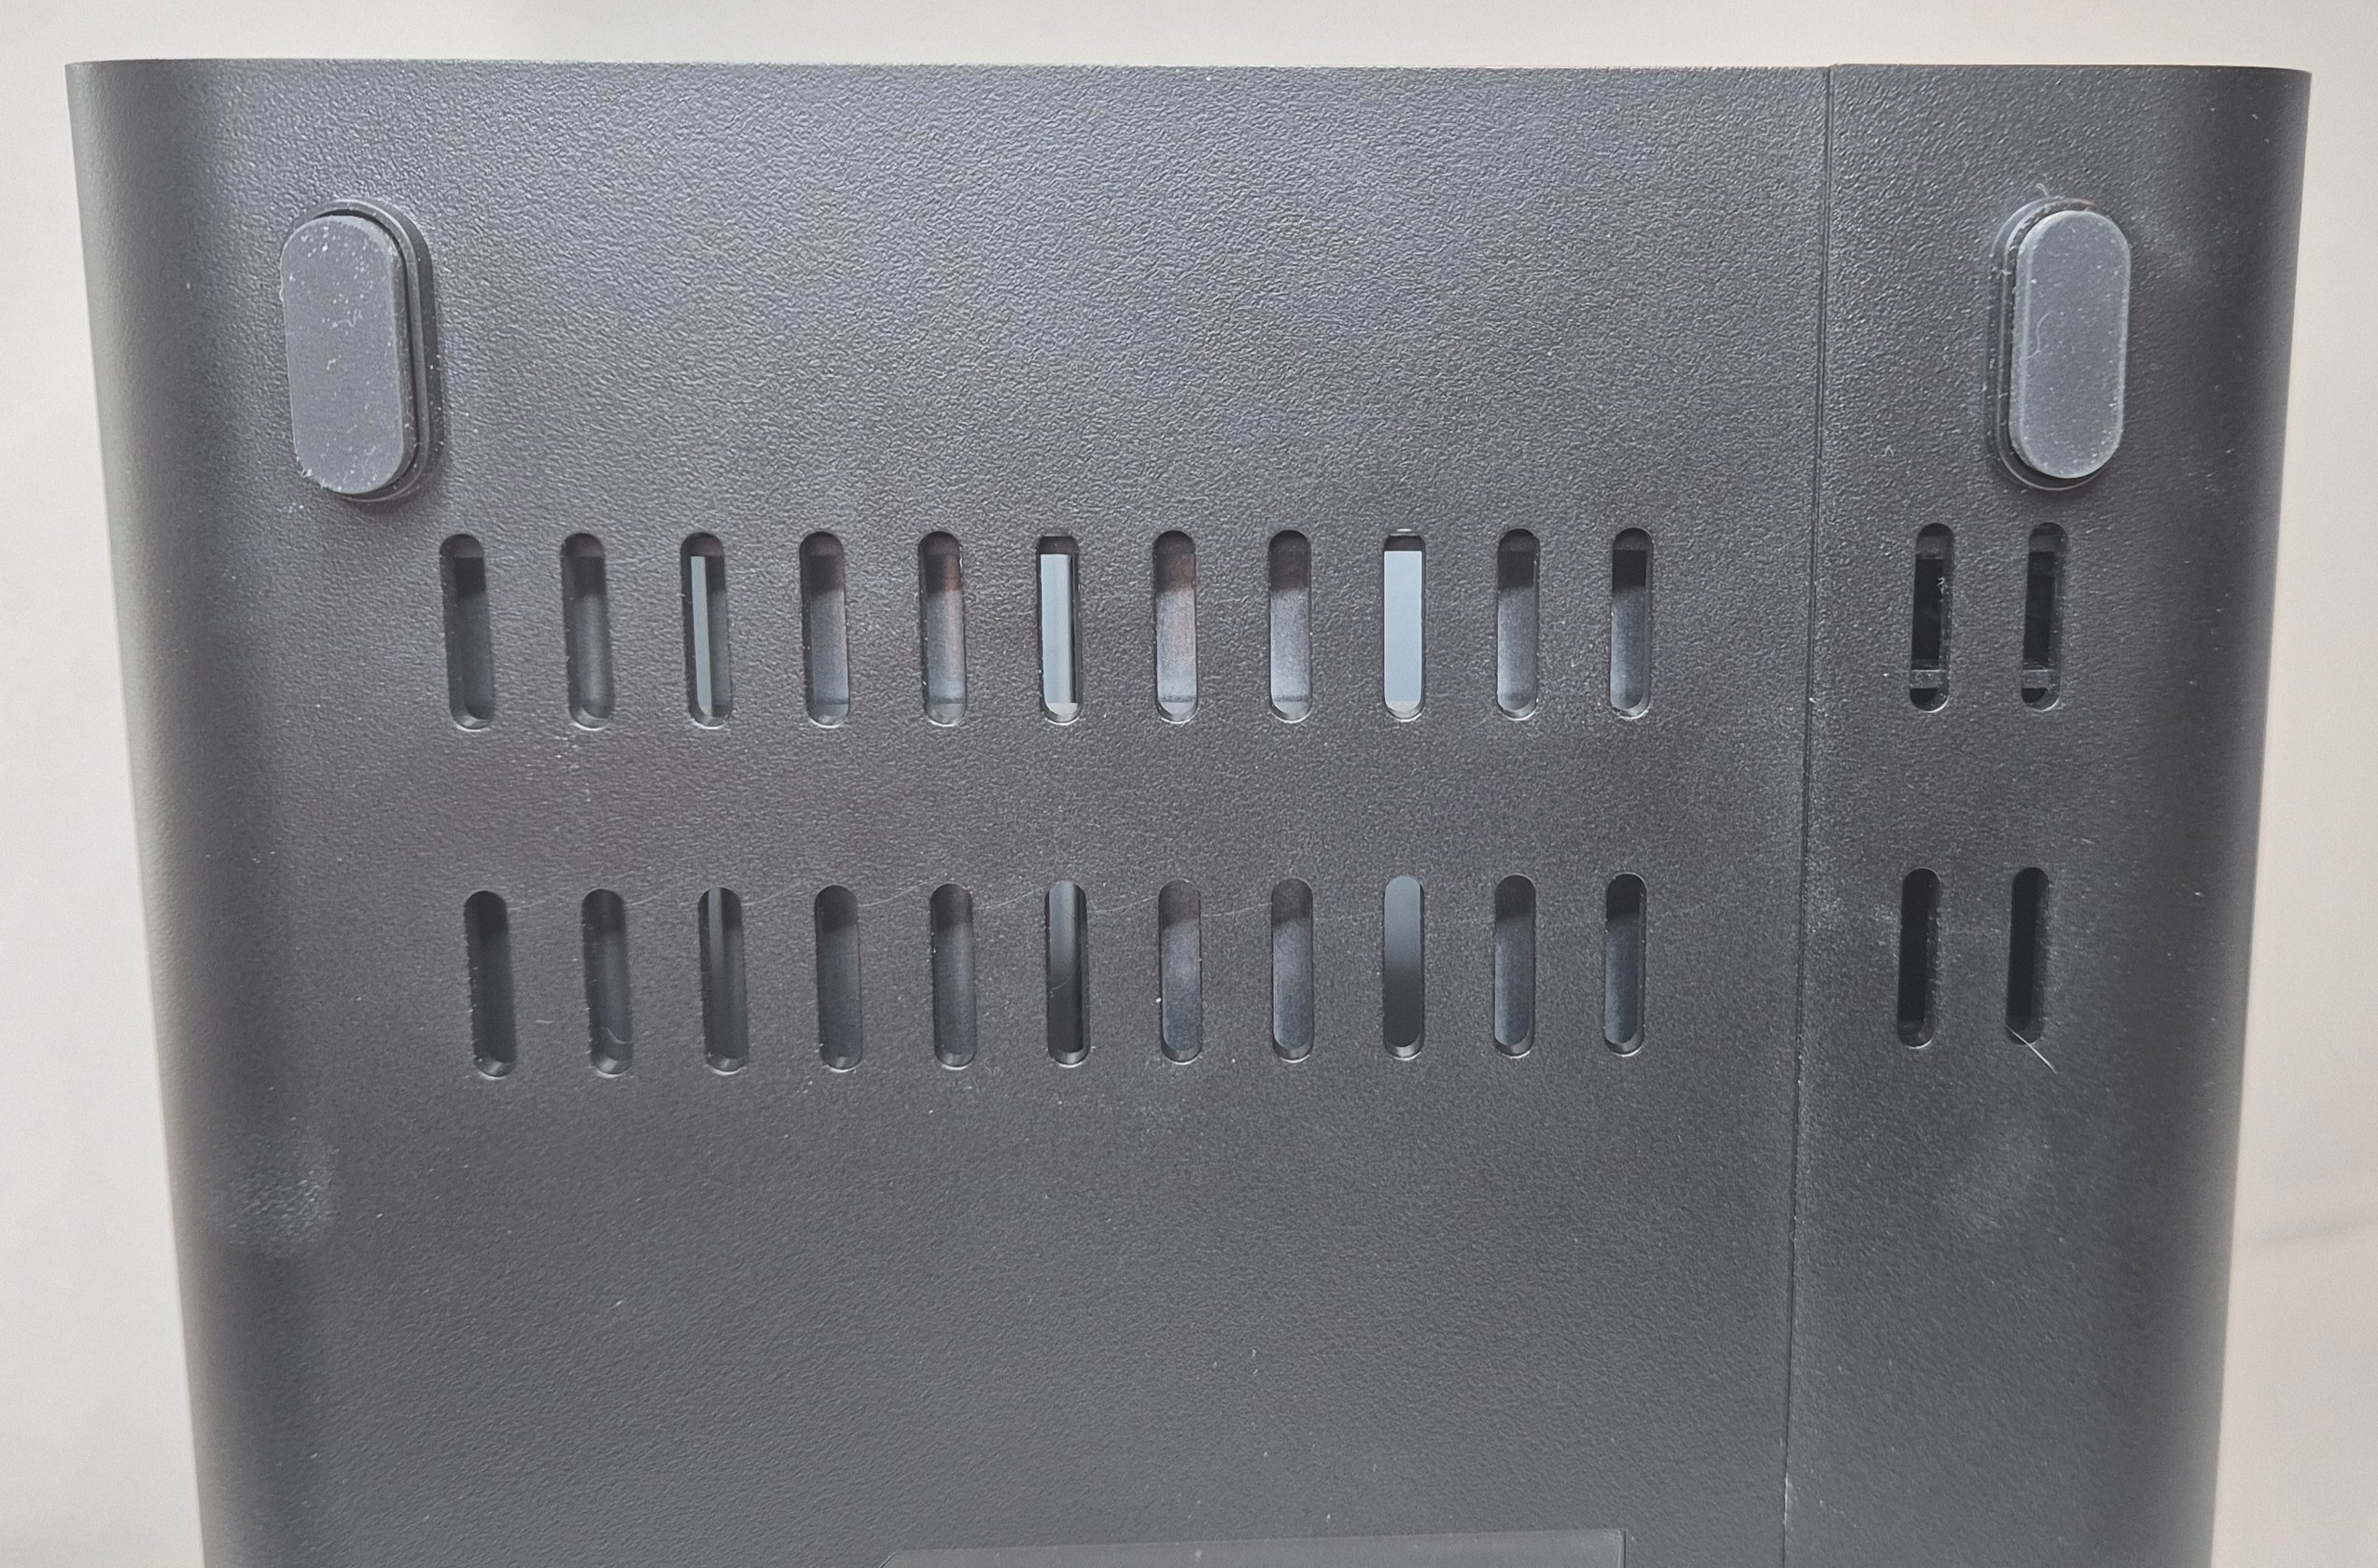 Ventilation holes under the device