Terramaster OS
Taking a quick look into TOS
Disclaimer: I only experimented with TOS very briefly, so take this article with a grain of salt.
Terramaster OS (TOS)
TerraMaster has developed its own Linux-based operating system called TOS for its NAS devices. The version I’m trying out is their latest stable release, 5.1.145 (release notes). According to their forums, a new major version TOS 6 is in the works but currently in beta. Since I won’t be using TOS long-term, I’ll be only briefly testing the latest stable version.
TOS has a web-based user interface for management, configuration, and administration. Similar to Synology, TerraMaster offers a range of utilities and apps for connecting computers and peripherals to the NAS. It has its own app center for expanding features and integrates with a community platform where users can download community apps and Docker container tutorials. Community apps have the .tpk extension, and there’s a developer guide available for creating your own apps.
Inspecting the USB
The device has an internal USB connector with a 4GB USB thumb drive pre-installed. This drive serves as the bootloader for initiating TOS installation. Before proceeding, I created a backup of the drive and flashed it onto the Samsung FIT USB for testing purposes.
1
2
3
4
5
6
7
8
9
10
11
12
13
14
15
16
17
18
19
20
21
22
23
24
25
26
27
# 1. Backup the USB drive
$ sudo dd if=/dev/sdc of=terramaster-usb.img bs=4M status=progress

3997171712 bytes (4.0 GB, 3.7 GiB) copied, 104 s, 38.4 MB/s
960+0 records in
960+0 records out
4026531840 bytes (4.0 GB, 3.8 GiB) copied, 105.14 s, 38.3 MB/s

# 2. Inspect the disk image, determine the sector size
# and the location of the start sector
$ fdisk -l terramaster-usb.img

Disk terramaster-usb.img: 3.75 GiB, 4026531840 bytes, 7864320 sectors
Units: sectors of 1 * 512 = 512 bytes
Sector size (logical/physical): 512 bytes / 512 bytes
I/O size (minimum/optimal): 512 bytes / 512 bytes
Disklabel type: gpt
Disk identifier: C4D1B464-8AA0-45EF-8C9C-00895F168BE1

Device               Start     End Sectors  Size Type
terramaster-usb.img1  2048 7862271 7860224  3.7G EFI System

# 3. Calculate the start sector position in bytes
# 512 * 2048 = 1048576

# 4. Mount the backup of the USB drive
$ sudo mount -o loop,offset=1048576 terramaster-usb.img /media/tos-usb
The USB drive contains the GRUB bootloader, and the grub.cfg file includes an if-else statement to check for the existence of a RAID partition with a bzImage file. If found, the system boots from the existing installation. Otherwise, it initiates the TOS installation process.
1
2
3
4
5
6
7
8
9
10
11
12
13
14
15
16
17
18
19
20
21
22
23
24
25
26
27
28
29
30
31
32
33
# For booting initialize system
menuentry "UTOS-X86-S64${uefi}" --id gnulinux {
	insmod mdraid1x # load raid1 support for grub

	if [ -e (md/UTOSCORE-X86-S64)/boot/bzImage ]; then
		echo "----------------------------"
		echo "- booting from RAID system -"
		echo "----------------------------"
		set root=(md/UTOSCORE-X86-S64)
		linux /boot/bzImage type=raid
	else
		echo "----------------------------"
		echo "- booting form INIT system -"
		echo "----------------------------"

		insmod search_label
		search --no-floppy --label UTOSBOOT --set=tmproot
		if [ -z "${tmproot}" ]; then
			search --no-floppy --label UTOSBOOT-X86-S64 --set=tmproot
		fi
		set from=${tmproot}
		if [ -z "${tmproot}" ]; then
			search --no-floppy --label UTOSDISK --set=tmproot
			set from=${tmproot}
		fi
		if [ -z "${tmproot}" ]; then
			search --no-floppy --label UTOSDISK-X86-S64 --set=tmproot
			set from=${tmproot}
		fi
		set root=${tmproot}
		linux /boot/bzImage type=usb from=$from
	fi
}
Filestructure of the USB drive can be found in usb-boot-filetree.txt
Installing the system
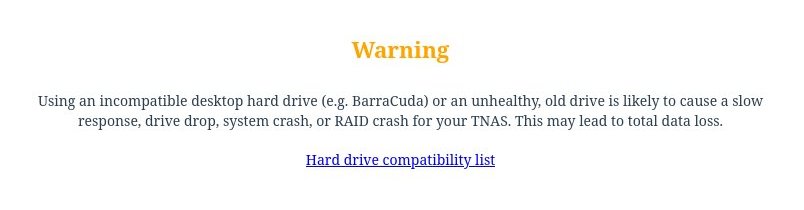 Warning about incompatible disks, links to compatibility page
 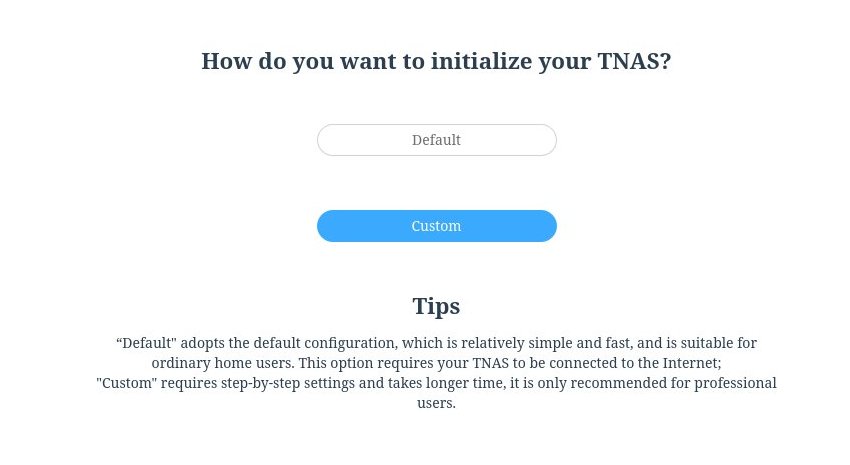 I used Custom setup
  It took some time until the installer verified the drive condition
 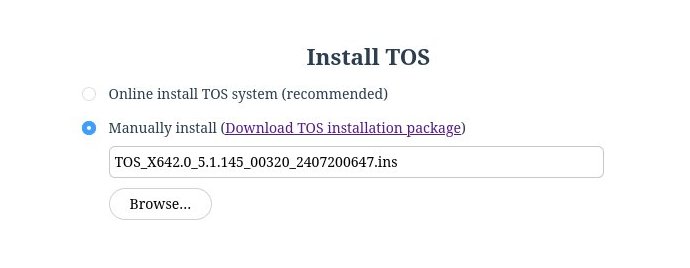 For faster installation I pre-downloaded installation package from Terramaster site
 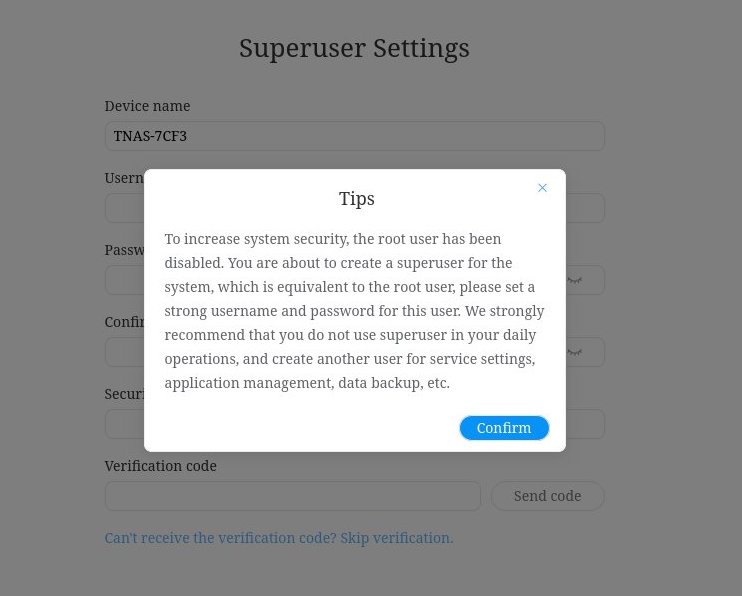 Root user is disabled
 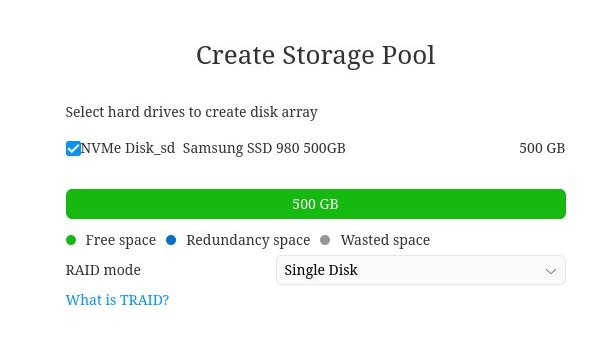 Available RAID modes were TRAID and Single Disk
 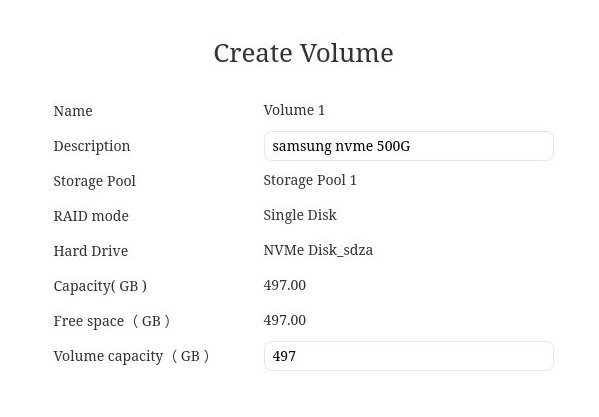 Overview of the volume configuration
 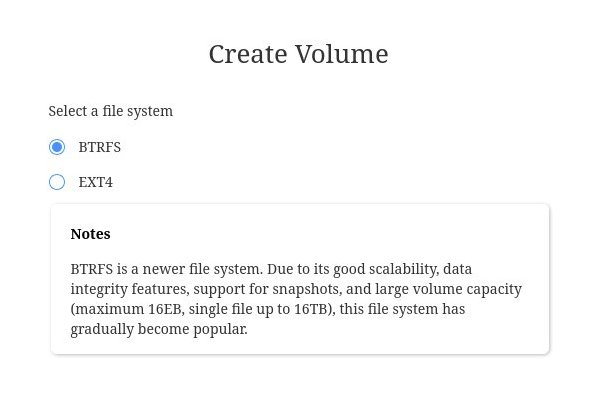 Filesystems available for volume
The installation process is handled entirely through a web interface. Curiously, the storage pool options were limited to RAID configurations, TerraMaster’s proprietary TRAID, and Single Disk mode. ZFS was notably absent. After a reboot, the system was up and running.
First Boot
 Interestingly some errors were shown in HDMI output during boot
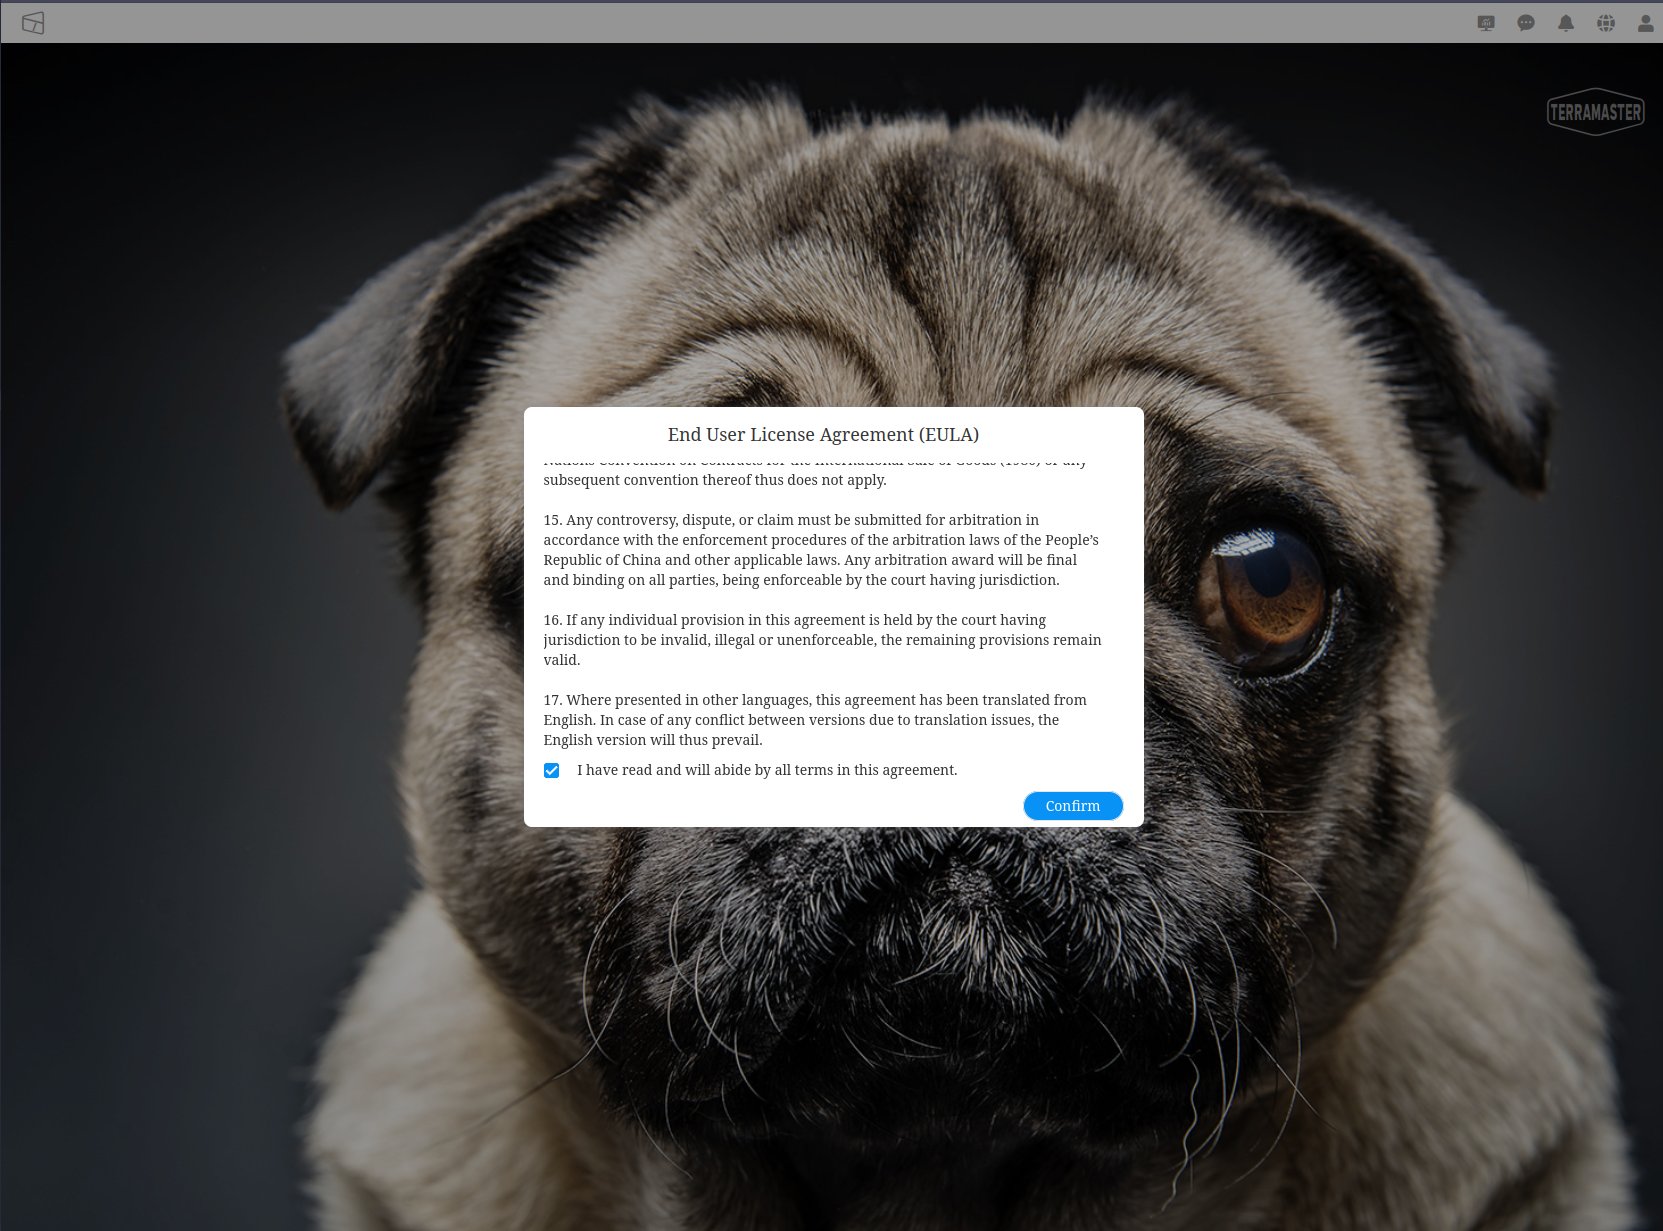 On first boot user is greeted with EULA
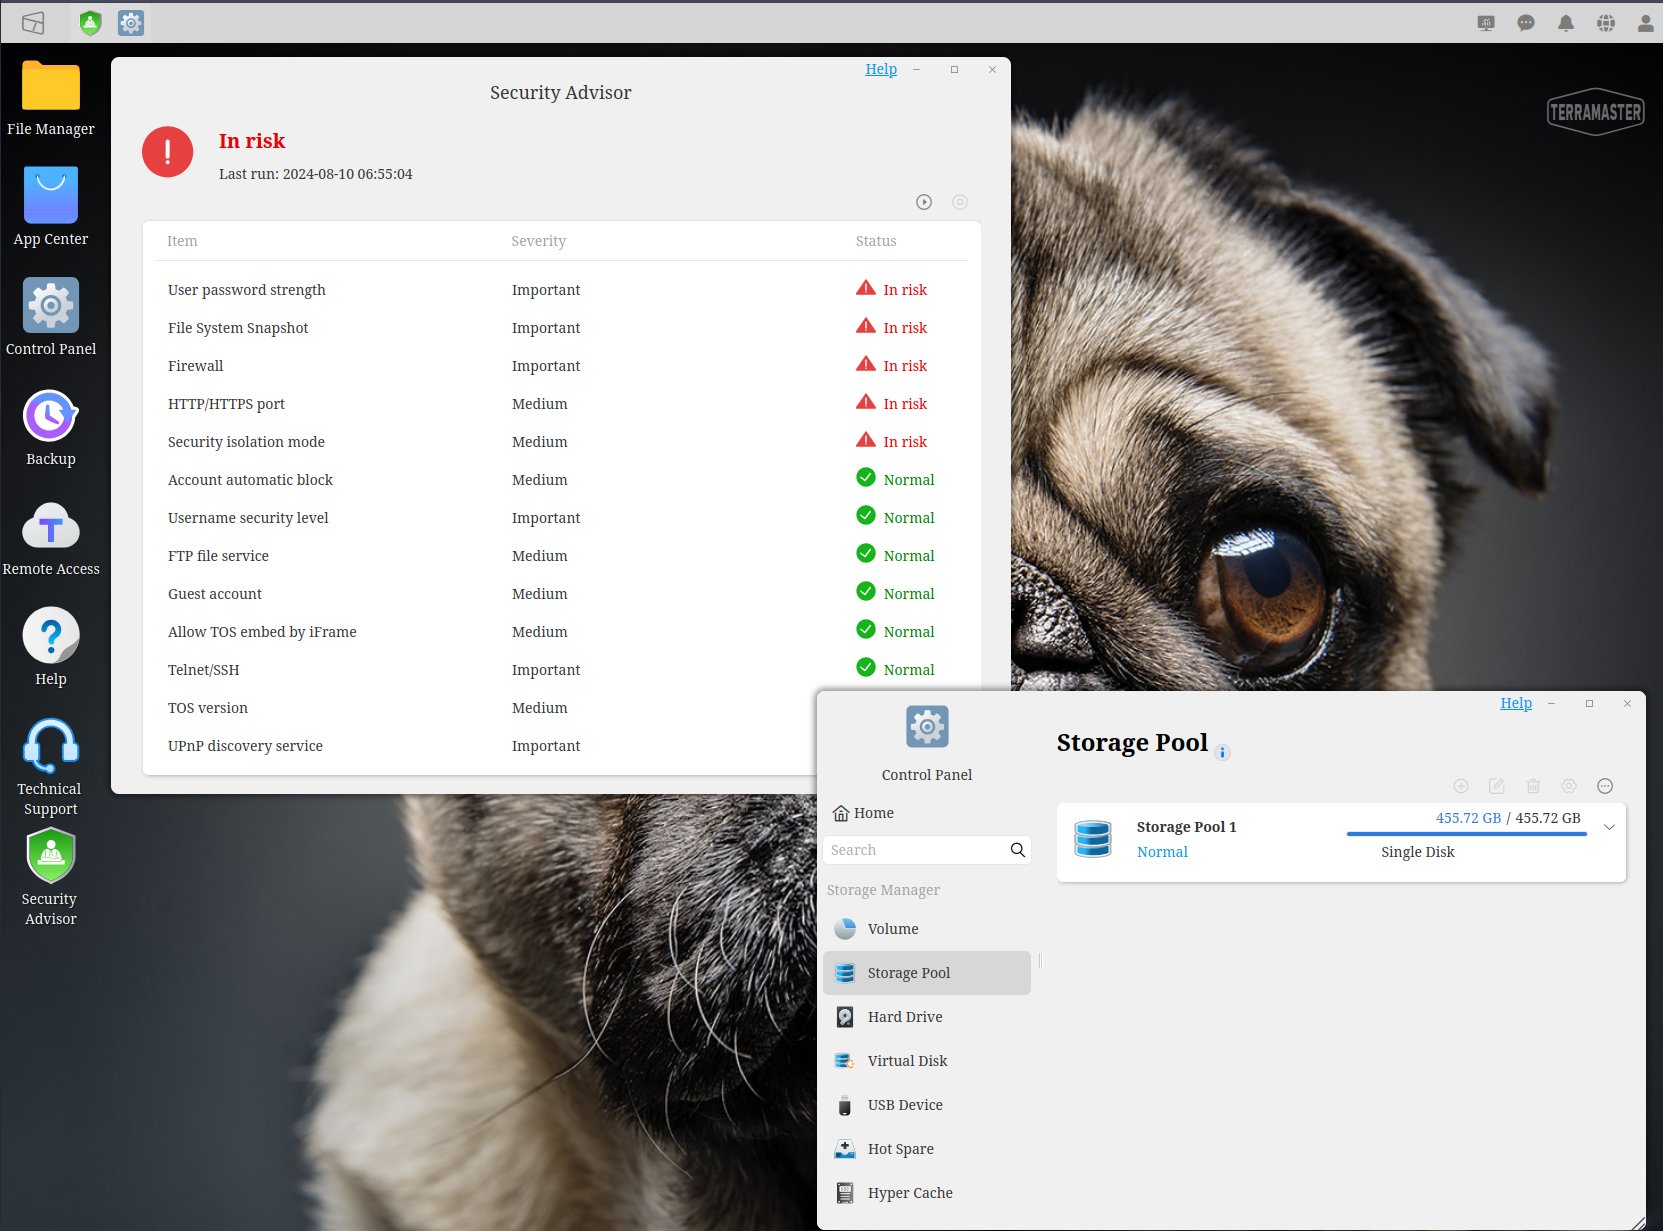 Security Advisor and Storage Pool
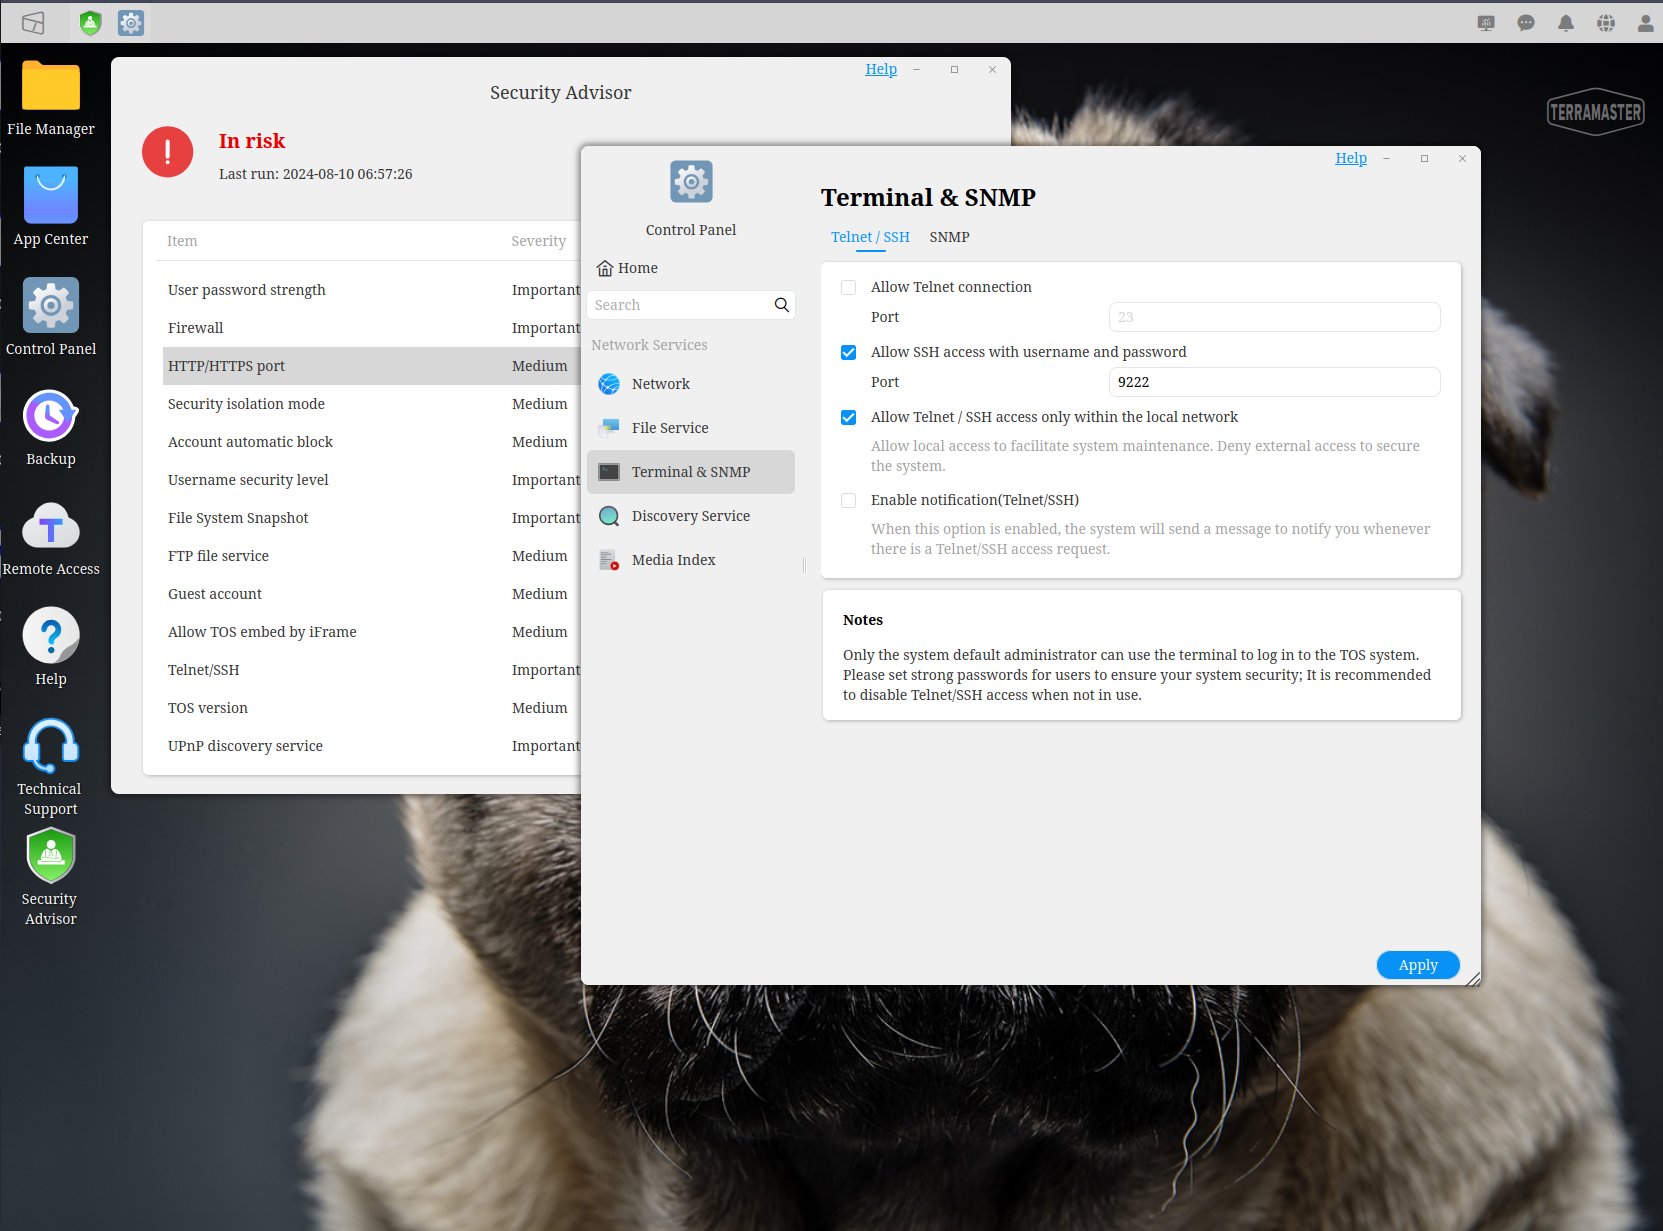 Terminal and SNMP configuration
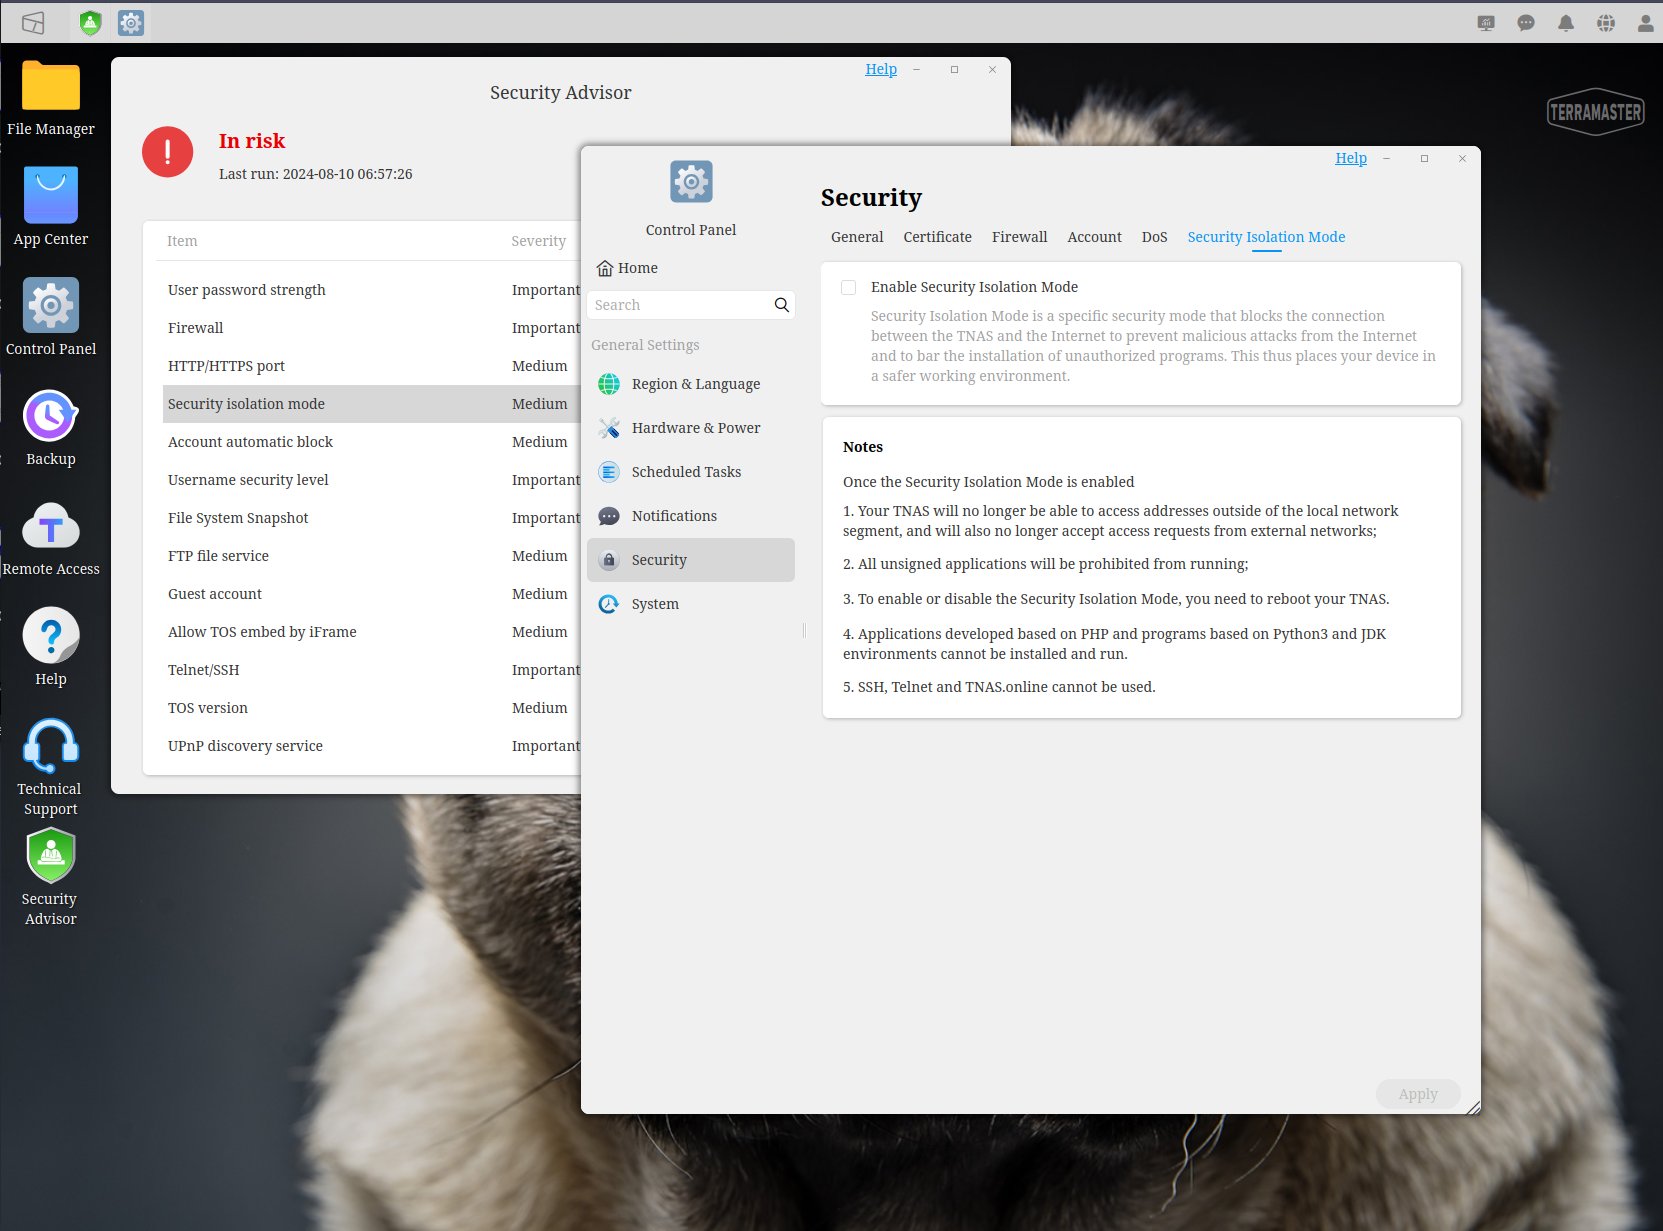 Isolation mode
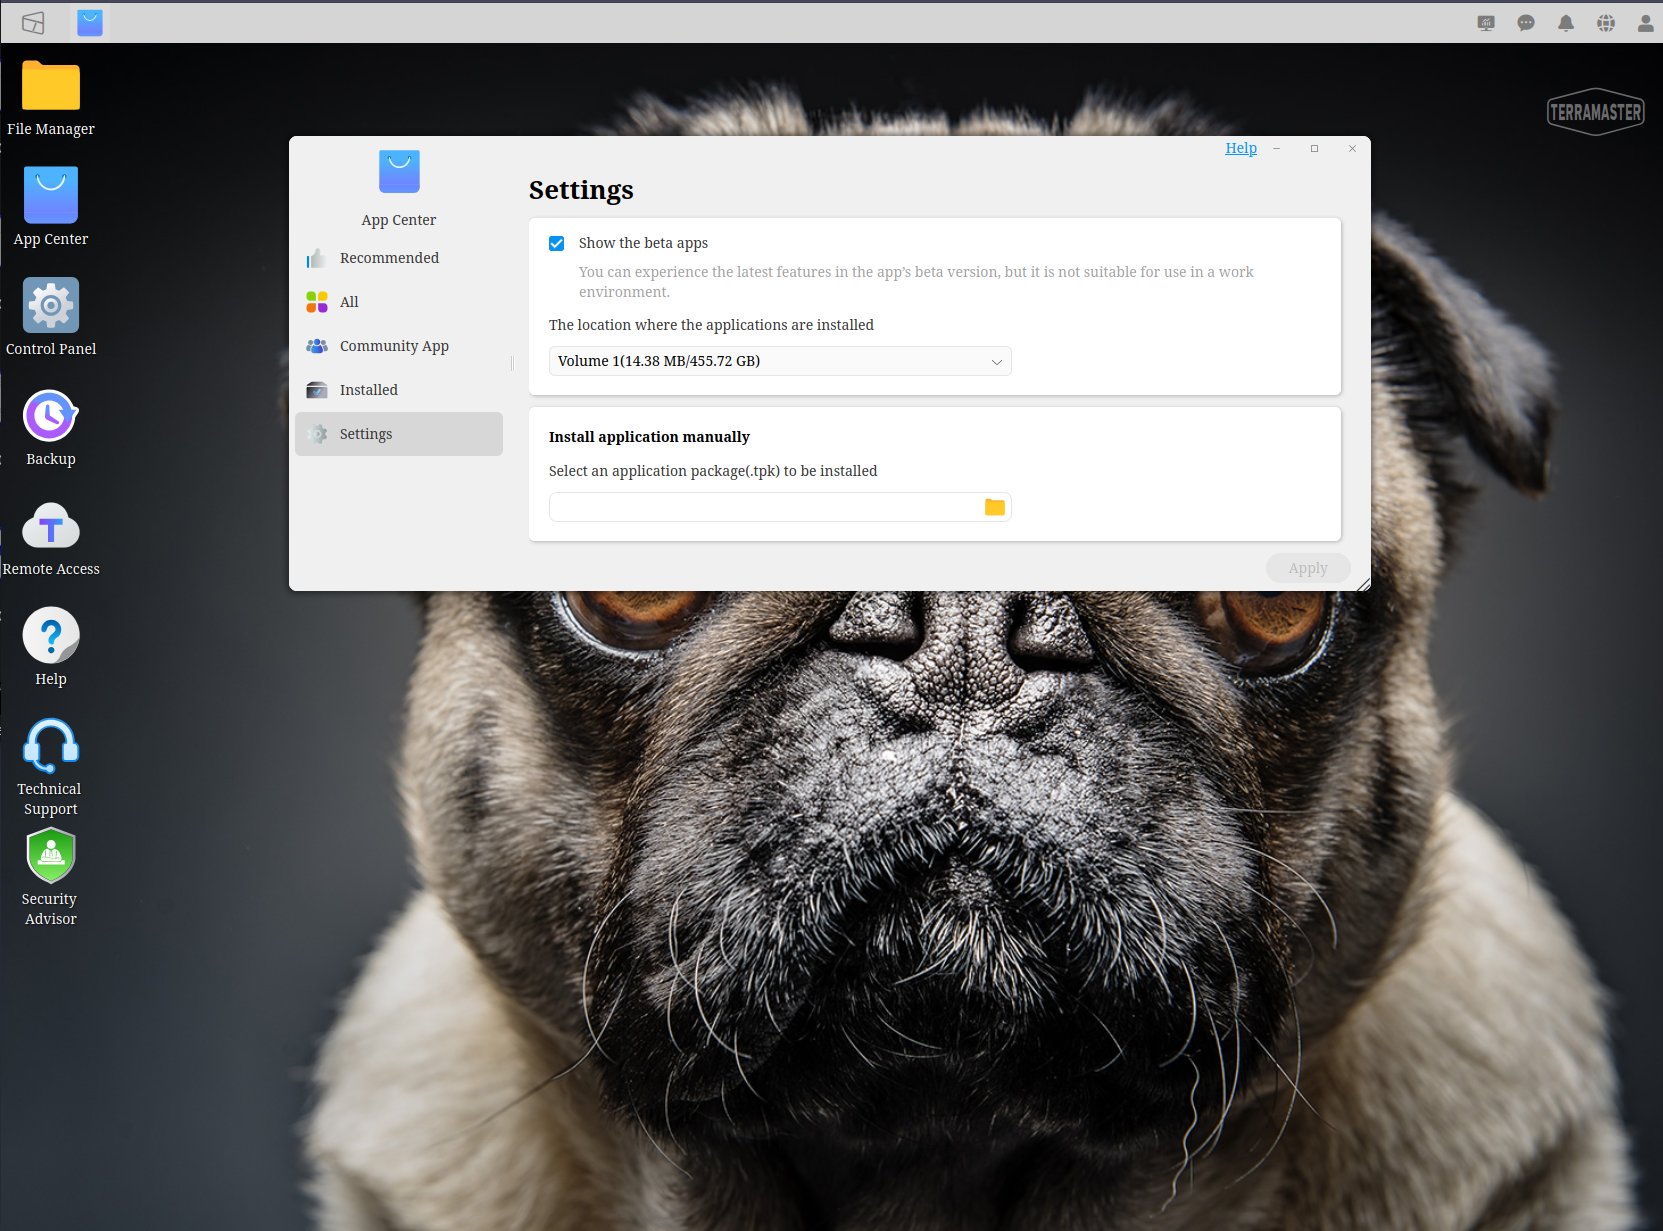 App Center
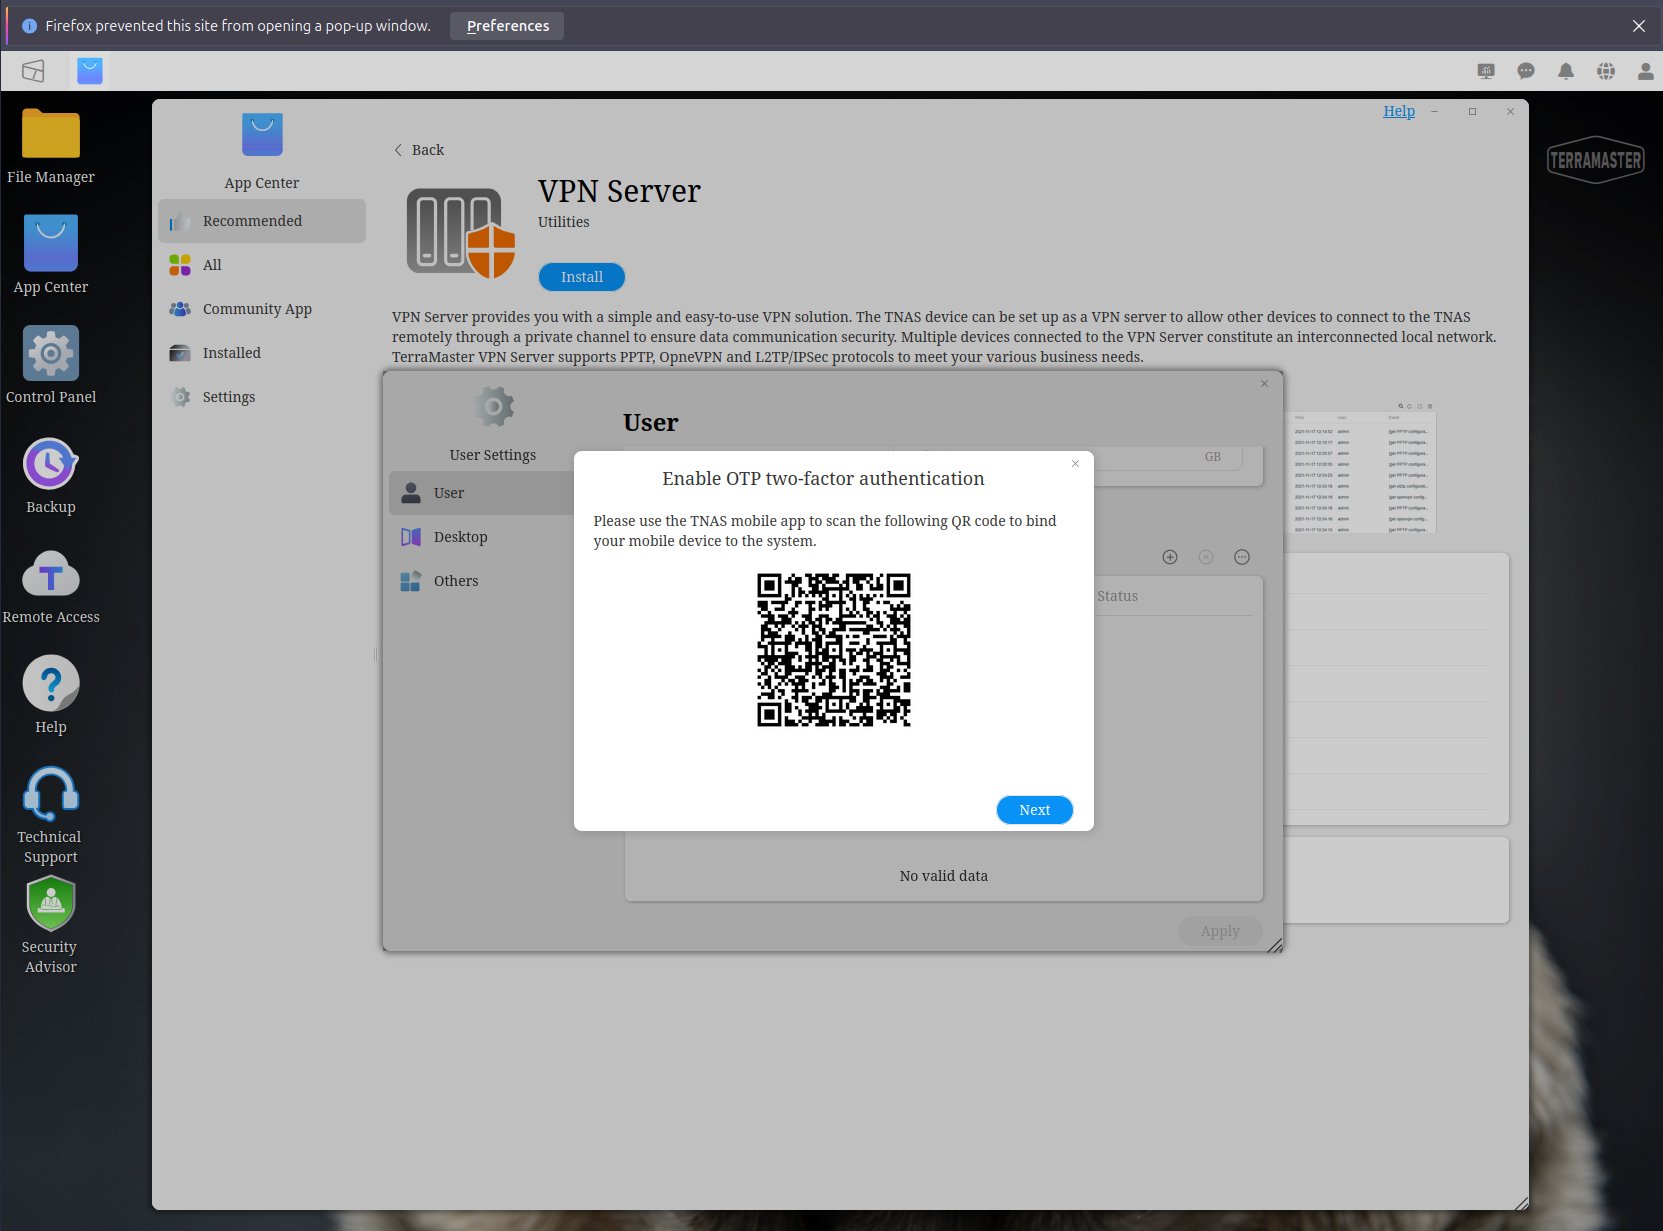 2FA Setup
The initial boot presented a few hiccups with error messages flashing on the HDMI output. Fortunately, these didn’t seem to impact functionality, and once the system fully booted, the web UI was accessible.
The first interaction was a mandatory EULA agreement. Following that, a Security Advisor popped up, highlighting settings that needed improvement or hadn’t been configured yet. Clicking on each item provided a description and a helpful link to the relevant setting.
SSH was disabled by default, but enabling it was straightforward, allowing for remote access. Interestingly, TOS offers a “Security Isolation Mode” that hardens the device’s security. It blocks incoming connections from the internet, prevents unsigned applications from running, disables SSH, and restricts the execution of applications based on PHP, Python3, and JDK environments.
While this sounds promising, I couldn’t find any information on signing custom apps. It seems TerraMaster tests custom applications before publishing them in the community but no information about signing. On a positive note, I was surprised to discover that TOS supports two-factor authentication.
Connecting the device via SSH
System
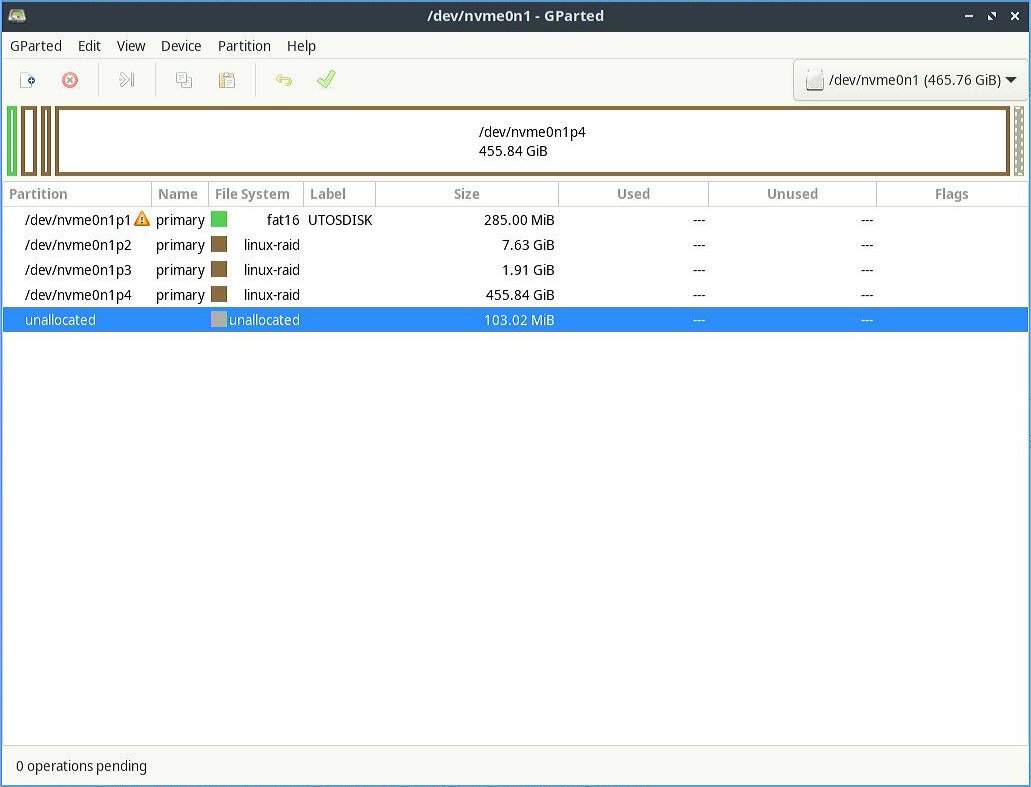 Samsung NVMe observed with GParted on Live Lubuntu 24.04 TOS 5.1.145 is based on Linux kernel version 5.15.59, the OS is built using Buildroot. The system is depending on
 mdadm software RAID package.
List of loaded kernel modules
1
2
3
4
5
6
7
8
9
10
11
12
13
14
15
16
17
18
19
20
21
22
# lsmod
Module                  Size  Used by
kvm_intel             270336  0
kvm                  1011712  1 kvm_intel
irqbypass              16384  1 kvm
aesni_intel           380928  0
crypto_simd            16384  1 aesni_intel
cryptd                 24576  1 crypto_simd
ipmi_devintf           20480  0
udf                   102400  0
crc_itu_t              16384  1 udf
i915                 2859008  1
ttm                    73728  1 i915
atlantic              180224  0
scst_raid              16384  0
scst_user              94208  0
scst_disk              20480  0
scst_vdisk            180224  0
iscsi_scst            217088  0
scst                 3956736  5 scst_disk,scst_raid,scst_user,scst_vdisk,iscsi_scst
88x2bu               3268608  0
8812au               1040384  0
Inspecting dmesg
The dmesg log shows several messages that indicate potential issues.
- ACPI Errors There are multiple instances of “ACPI BIOS Error (bug): Could not resolve symbol”. These errors suggest that the UEFI has some compatibility issues with the ACPI specification.
- ax88179 Errors “ax88179_178a 2-2.3:2.1 (unnamed net_device) (uninitialized): invalid MAC address, using random”. This adapter is on my USB-C hub, so it is expected TOS to not have full support for it.
- GPT Errors on sda These are due to cloning the 4GB drive to a larger drive where the partition table size does not match.
- udevd conflicting device node The message “udevd[5539]: conflicting device node ‘/dev/mapper/vg0-lv0’ found, link to ‘/dev/dm-0’ will not be created” suggests a potential conflict in device naming or mapping.
- Setting dangerous option enable_guc Not dangerous, source.
- 8812au The message “8812au: loading out-of-tree module taints kernel”. Looking into kernel module info it is Realtek 8812au USB Wifi Adapter, however, no such device is present:
1
2
3
4
5
6
7
8
9
10
11
12
13
14
15
16
17
18
19
20
21
22
23
24
25
26
27
28
29
30
31
32
33
34
35
36
37
38
39
40
41
42
43
44
45
46
47
48
49
50
51
52
53
54
55
56
57
58
59
60
61
62
63
64
65
66
67
68
69
70
71
72
73
74
75
76
77
78
79
80
81
82
83
84
85
86
87
88
89
90
91
92
93
94
95
96
97
98
99
100
101
102
# /sbin/modinfo 8812au
filename:       /lib/modules/5.15.59/extra/8812au.ko
version:        v4.2.3
author:         Realtek Semiconductor Corp.
description:    Realtek Wireless Lan Driver
license:        GPL
srcversion:     E0CF5C20195CCE7ADDAA1C1
alias:          usb:v2357p0120d*dc*dsc*dp*ic*isc*ip*in*
alias:          usb:v2357p011Ed*dc*dsc*dp*ic*isc*ip*in*
alias:          usb:v0BDAp0823d*dc*dsc*dp*ic*isc*ip*in*
alias:          usb:v3823p6249d*dc*dsc*dp*ic*isc*ip*in*
alias:          usb:v2001p3318d*dc*dsc*dp*ic*isc*ip*in*
alias:          usb:v0BDApA811d*dc*dsc*dp*ic*isc*ip*in*
alias:          usb:v04BBp0959d*dc*dsc*dp*ic*isc*ip*in*
alias:          usb:v04BBp0953d*dc*dsc*dp*ic*isc*ip*in*
alias:          usb:v056Ep4007d*dc*dsc*dp*ic*isc*ip*in*
alias:          usb:v0411p029Bd*dc*dsc*dp*ic*isc*ip*in*
alias:          usb:v0411p0242d*dc*dsc*dp*ic*isc*ip*in*
alias:          usb:v2019pAB32d*dc*dsc*dp*ic*isc*ip*in*
alias:          usb:v0846p9052d*dc*dsc*dp*ic*isc*ip*in*
alias:          usb:v2001p3314d*dc*dsc*dp*ic*isc*ip*in*
alias:          usb:v7392pA813d*dc*dsc*dp*ic*isc*ip*in*
alias:          usb:v7392pA812d*dc*dsc*dp*ic*isc*ip*in*
alias:          usb:v7392pA811d*dc*dsc*dp*ic*isc*ip*in*
alias:          usb:v0BDAp8822d*dc*dsc*dp*ic*isc*ip*in*
alias:          usb:v0BDAp0821d*dc*dsc*dp*ic*isc*ip*in*
alias:          usb:v0BDAp0811d*dc*dsc*dp*ic*isc*ip*in*
alias:          usb:v2604p0012d*dc*dsc*dp*ic*isc*ip*in*
alias:          usb:v0BDAp8812d*dc*dsc*dp*ic*isc*ip*in*
alias:          usb:v0411p025Dd*dc*dsc*dp*ic*isc*ip*in*
alias:          usb:v2357p0122d*dc*dsc*dp*ic*isc*ip*in*
alias:          usb:v2357p010Ed*dc*dsc*dp*ic*isc*ip*in*
alias:          usb:v2357p010Dd*dc*dsc*dp*ic*isc*ip*in*
alias:          usb:v2357p0103d*dc*dsc*dp*ic*isc*ip*in*
alias:          usb:v2357p0101d*dc*dsc*dp*ic*isc*ip*in*
alias:          usb:v20F4p805Bd*dc*dsc*dp*ic*isc*ip*in*
alias:          usb:v2001p3316d*dc*dsc*dp*ic*isc*ip*in*
alias:          usb:v2001p3315d*dc*dsc*dp*ic*isc*ip*in*
alias:          usb:v07B8p8812d*dc*dsc*dp*ic*isc*ip*in*
alias:          usb:v2019pAB30d*dc*dsc*dp*ic*isc*ip*in*
alias:          usb:v1740p0100d*dc*dsc*dp*ic*isc*ip*in*
alias:          usb:v13B1p003Fd*dc*dsc*dp*ic*isc*ip*in*
alias:          usb:v1058p0632d*dc*dsc*dp*ic*isc*ip*in*
alias:          usb:v2001p3313d*dc*dsc*dp*ic*isc*ip*in*
alias:          usb:v0586p3426d*dc*dsc*dp*ic*isc*ip*in*
alias:          usb:v0E66p0022d*dc*dsc*dp*ic*isc*ip*in*
alias:          usb:v0B05p17D2d*dc*dsc*dp*ic*isc*ip*in*
alias:          usb:v0409p0408d*dc*dsc*dp*ic*isc*ip*in*
alias:          usb:v0789p016Ed*dc*dsc*dp*ic*isc*ip*in*
alias:          usb:v04BBp0952d*dc*dsc*dp*ic*isc*ip*in*
alias:          usb:v0DF6p0074d*dc*dsc*dp*ic*isc*ip*in*
alias:          usb:v7392pA822d*dc*dsc*dp*ic*isc*ip*in*
alias:          usb:v2001p330Ed*dc*dsc*dp*ic*isc*ip*in*
alias:          usb:v050Dp1109d*dc*dsc*dp*ic*isc*ip*in*
alias:          usb:v2604p0012d*dc*dsc*dp*ic*isc*ip*in*
alias:          usb:v050Dp1106d*dc*dsc*dp*ic*isc*ip*in*
alias:          usb:v0BDAp881Cd*dc*dsc*dp*ic*isc*ip*in*
alias:          usb:v0BDAp881Bd*dc*dsc*dp*ic*isc*ip*in*
alias:          usb:v0BDAp881Ad*dc*dsc*dp*ic*isc*ip*in*
alias:          usb:v0BDAp8812d*dc*dsc*dp*ic*isc*ip*in*
depends:
name:           8812au
vermagic:       5.15.59 SMP mod_unload
parm:           rtw_ips_mode:The default IPS mode (int)
parm:           rtw_regulatory_id:int
parm:           ifname:The default name to allocate for first interface (charp)
parm:           if2name:The default name to allocate for second interface (charp)
parm:           rtw_initmac:charp
parm:           rtw_channel_plan:int
parm:           rtw_chip_version:int
parm:           rtw_rfintfs:int
parm:           rtw_lbkmode:int
parm:           rtw_network_mode:int
parm:           rtw_channel:int
parm:           rtw_mp_mode:int
parm:           rtw_wmm_enable:int
parm:           rtw_vrtl_carrier_sense:int
parm:           rtw_vcs_type:int
parm:           rtw_busy_thresh:int
parm:           rtw_ht_enable:int
parm:           rtw_bw_mode:int
parm:           rtw_ampdu_enable:int
parm:           rtw_rx_stbc:int
parm:           rtw_ampdu_amsdu:int
parm:           rtw_vht_enable:int
parm:           rtw_lowrate_two_xmit:int
parm:           rtw_rf_config:int
parm:           rtw_power_mgnt:int
parm:           rtw_smart_ps:int
parm:           rtw_low_power:int
parm:           rtw_wifi_spec:int
parm:           rtw_antdiv_cfg:int
parm:           rtw_antdiv_type:int
parm:           rtw_enusbss:int
parm:           rtw_hwpdn_mode:int
parm:           rtw_hwpwrp_detect:int
parm:           rtw_hw_wps_pbc:int
parm:           rtw_max_roaming_times:The max roaming times to try (uint)
parm:           rtw_mc2u_disable:int
parm:           rtw_80211d:Enable 802.11d mechanism (int)
parm:           rtw_notch_filter:0:Disable, 1:Enable, 2:Enable only for P2P (uint)
parm:           rtw_led_enable:Enable status LED (int)
Setting up Storage Pool
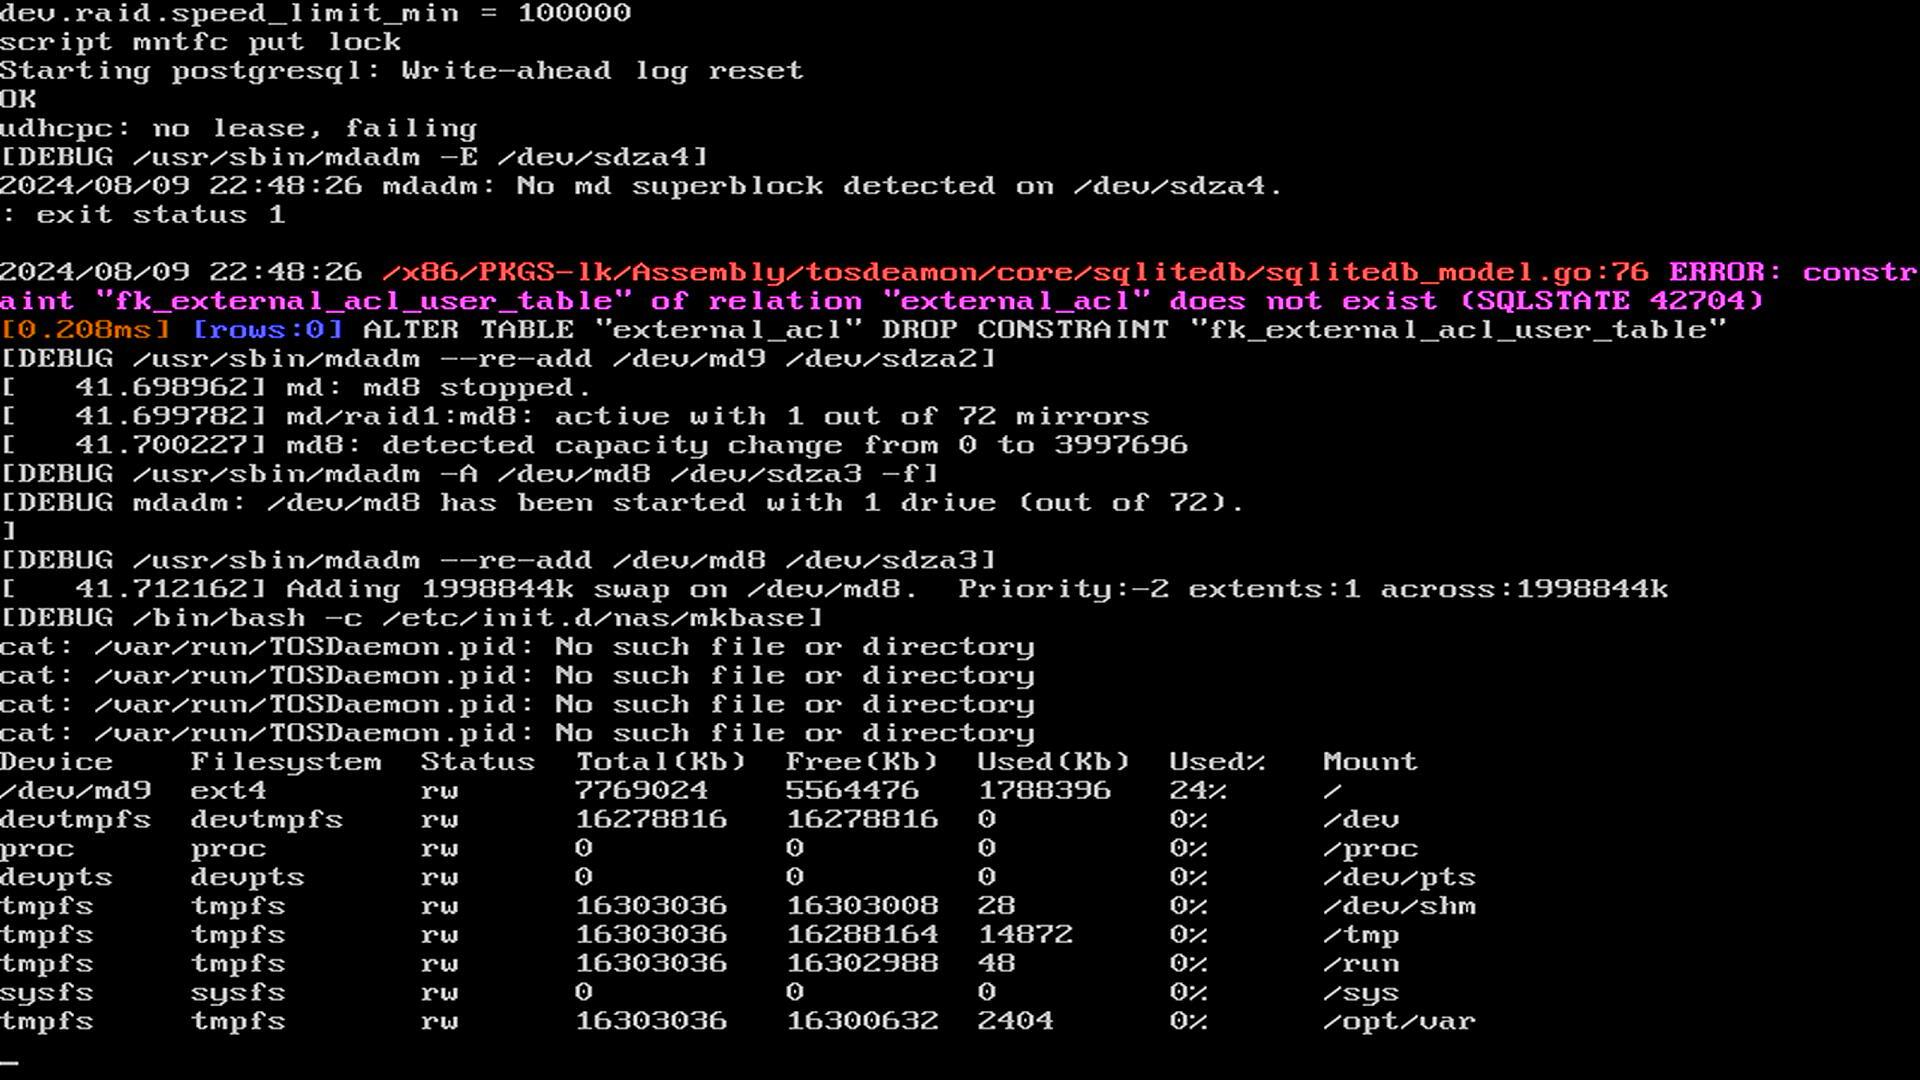
 Booting after installing HDDs got stuck and the web-ui was not operational
 After setting 2 drives into TRAID 10 setup
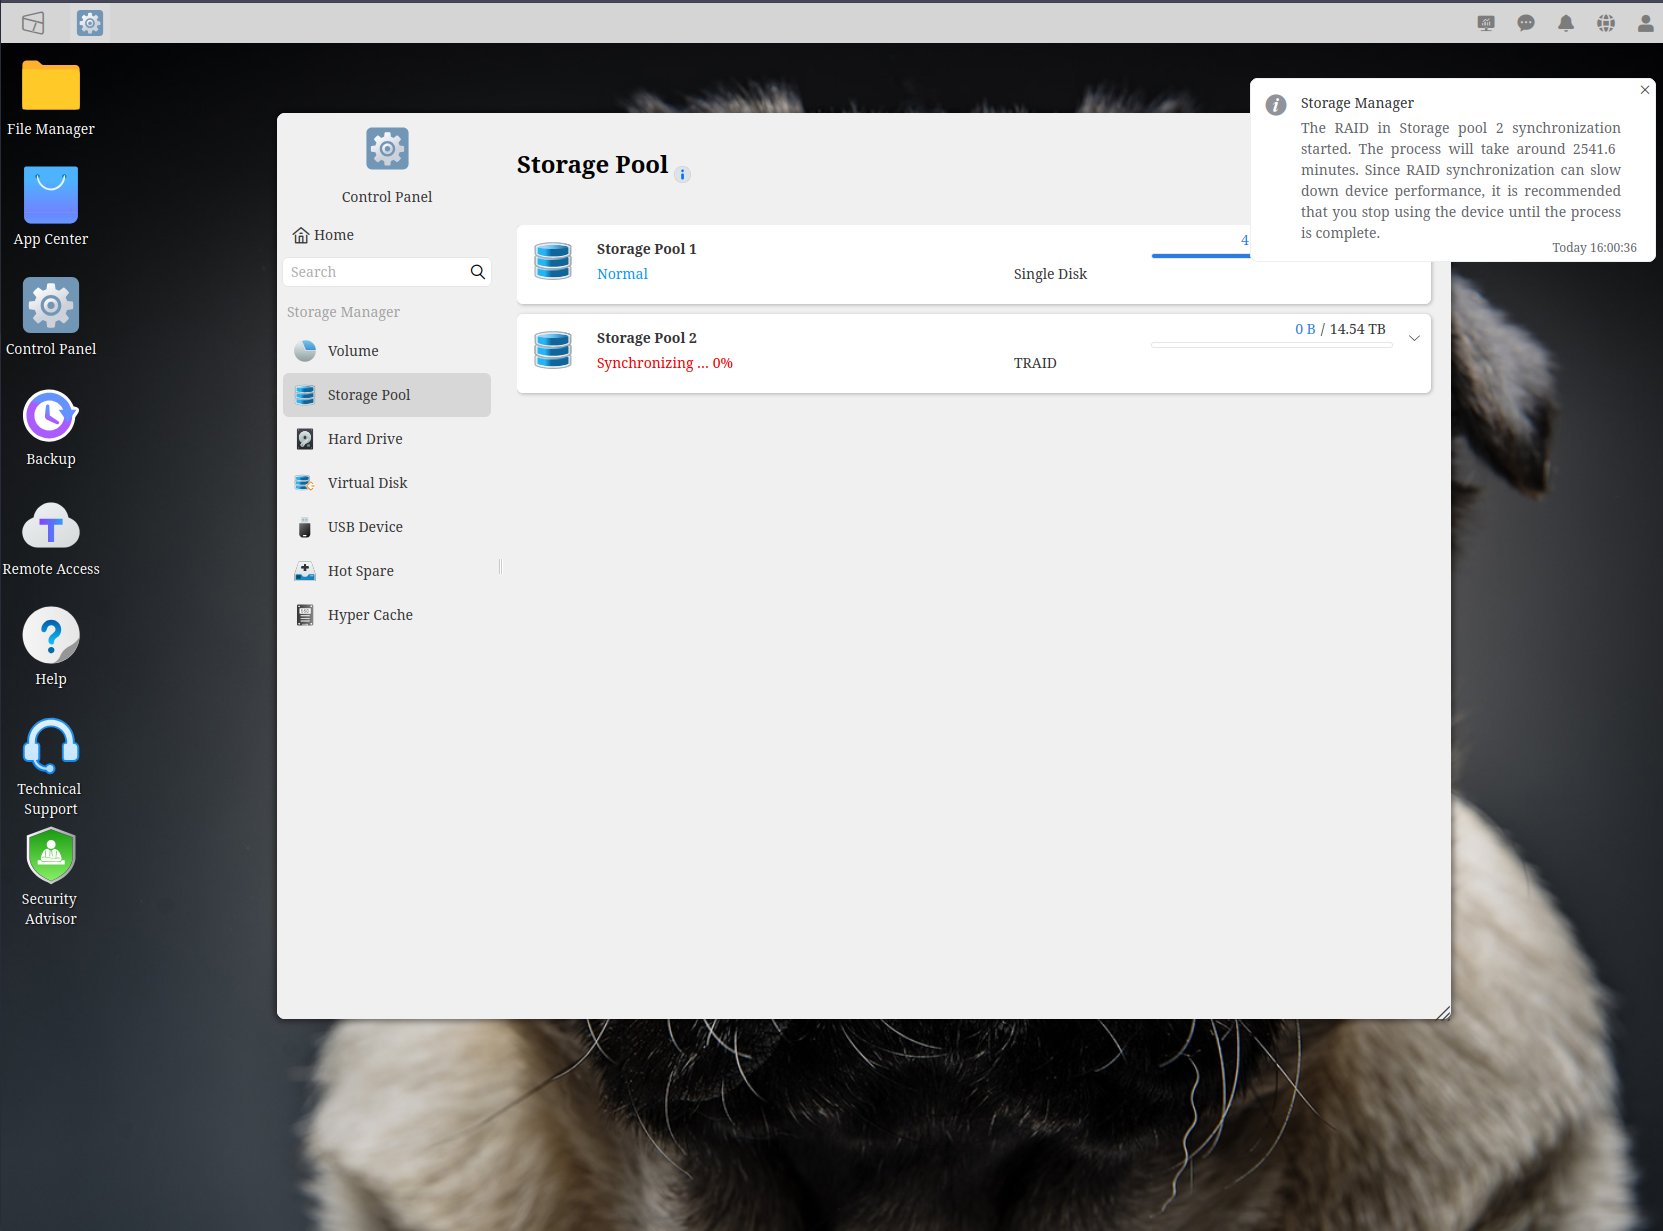
After installing all four HDDs and booting the system, the startup process stalled while waiting for TOSDaemon.pid to appear. After waiting for about fifteen more minutes with no progress, I decided to power-cycle the device. Thankfully, the next boot proceeded without any issues.
I then attempted to set up a TRAID 10 configuration using two disks. However the web UI displayed a long estimated completion time of around 2541.6 minutes (~43 hours). Hoping this was an overestimation, I waited a bit longer. After fifteen minutes the synchronization process had only reached to 0.26%, at that point I decided to abandon my TOS experimentation.